Printing Cardstock Paper and Finishing (Booklets)
Pre-Reqs
Open Me!
- You MUST initialize your Uniflow account to use the Grace Church copiers. Please refer to Uniflow Cloud Printing... | Grace Church KB (gracechurches.org)
- In order to send print jobs to Secure Print Input queue, which we will be using in the below tutorial, you MUST be using the current version of the Uniflow SmartClient Software on your computer, and it needs to be running in the background: How to Update Uniflow ... | Grace Church KB (gracechurches.org)
- Make sure you understand all the supported functionalities of the printer you intend to print to before executing your print job. While all of our Copiers support cardstock, not all of them have the same finishing capabilities (stapling, folding, etc): Copier-Printer Service... | Grace Church KB (gracechurches.org)
- If doing a big print job, consider letting people in the office know so that they don't accidentally use the tray you are using for your job.
- On Windows, to get every finishing option / paper selection option, you need to add the Print Profile to your Uniflow Print Driver to enable the options as documented here: Set uniFLOW Printer De... | Grace Church KB (gracechurches.org)
Cardstock - Intro
Cardstock is thicker paper, which requires it to be treated differently than normal computer paper. The Canon Production Printers can print on cardstock, but you will need to tell it when you are wanting to print in cardstock and which tray to print from.
The way to tell our Canon printers when to print on Cardstock printer is relatively straightforward on the Copier touchscreen interface. Since computer paper is what's normally loaded in the paper trays, I recommend loading up the bypass (also called Multi-Purpose) tray with cardstock (this tray is usually to the side of the printer). When you load up the bypass tray, the sensor will detect this action and will forward a prompt like the one below on the Copier touchscreen:
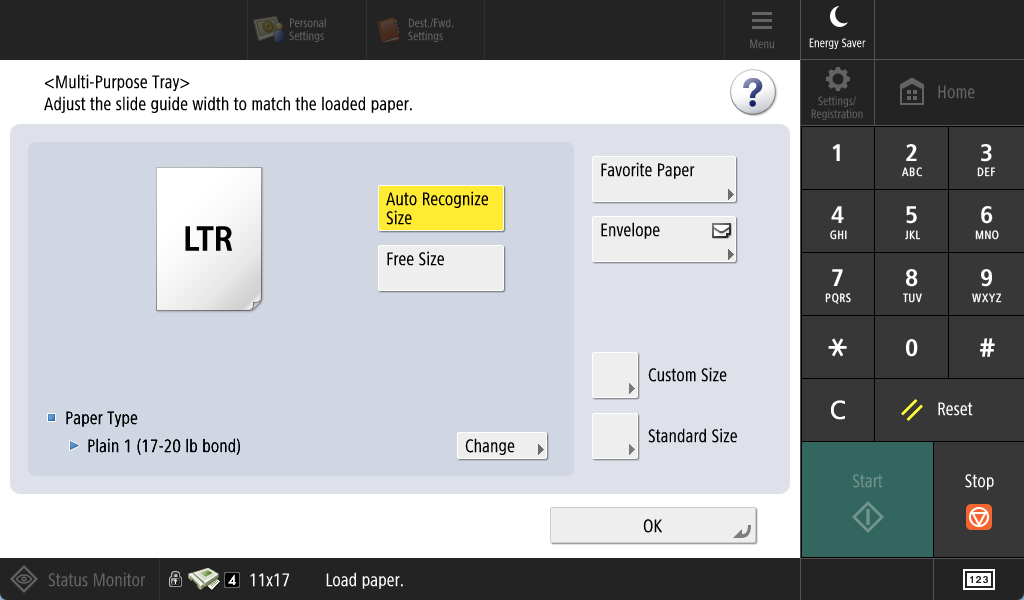
By DEFAULT, the printer expects just plain paper as can be seen in the above picture. This prompt will let you tell the printer to change the type of paper from the tray you want to print from.
You need this prompt to show up in order to tell the copier to change the paper type to print on using bypass. If this prompt doesn't show up for you, make sure that the paper is loaded into the bypass tray correctly and that the sensor is able to detect that the paper is there. It is not required to be logged into the printer to be able to bring up the prompt.
Bath Campus Copiers - Bypass Tray
At the Bath Campus, our Copiers are set to anticipate that you print Cardstock ON THE BYPASS TRAY. As long as you use the Bypass for this, you don't have to worry about changing the paper type on the Copier touchscreen.
Select Paper Type on Bypass Tray - Step By Step
- Load in the cardstock into the Bypass Tray.
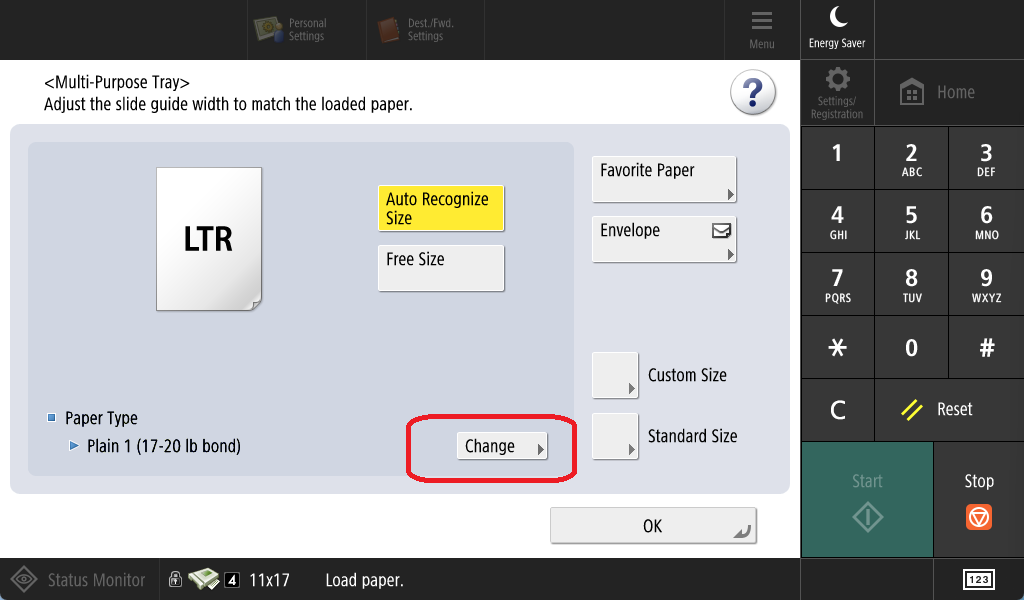
- A prompt should show up on the Copier TouchScreen. Hit "Change" next to Paper Type.
- Choose one of the heavy paper options in the next screen. Here I tap Heavy 7, which is the heaviest paper available, but your campus might use a different cardstock (i.e., Bath SHOULD be using Heavy 7 paper). Tap Okay to Confirm.

-
Then tap Okay again, verifying that Heavy is loaded in as the paper type. You have now told the printer that the Bypass Tray is loaded with Cardstock paper (or Heavy).


Below are some animations of examples of how you may be printing Cardstock:
Making Cardstock Copies using Bypass Tray
Cardstock Print to Secure Print using Bypass Tray

Direct Print (On Windows)
Remember: You need to add the Print Profile to the Secure Print Driver in order to change paper type on the Windows driver!!!! OTHERWISE YOU WON'T BE PRINTING CARDSTOCK PROPERLY
Note: Currently as of April 2024, while they do have most of the finishing options the macOS Uniflow Print drivers do not support selecting Cardstock as your paper type. If printing from a mac, please use the Secure Print Queue method to do cardstock printing.
To Direct Print Cardstock instead of doing it all in Secure Print, prepare the printer bypass tray with cardstock, and then you just need to change the following print settings under the Paper Source Tab in the Print Driver window:
- Paper Source: Multipurpose Tray (the bypass)
- Paper Type: Heavy Setting (select Heavy corresponding to the cardstock density your campus uses)
- Use one of the Printer Options, Secure Print or Direct Print.
Tutorials
Printing (Cardstock) Booklets
In addition to cardstock, some of our Production printers have finishing abilities like staple, holepunch, folding, saddle stich printing, etc. The most recent version of our Uniflow Secure Print Driver allows you to use most of these finishing options; however, the driver assumes that you will be printing on a printer that supports those finishing options that you select. Not all of our printers have all the finishing options, so the best way to set your options is to
- From your computer, submit your print job to the Secure Print Queue printer instead of Direct Print
- Load up the appropriate tray for the paper you will be using
- I still recommend using the Bypass tray for Cardstock paper, and using the above instructions for changing paper type on the bypass tray.
- Login and open the Secure Print app on the Copier. Find your print job you uploaded.
- Finalize your print settings and finishing options on the Copier Touchscreen interface.
- The Copier screen will confirm which finishing options it supports by displaying the options.
- Do a Test print to make sure that the copier will print what you expect it to.
- Make any necessary adjustments and then execute your entire print job.
This tutorial we will use the Copier to set the settings our print job for a 3 page double-sided booklet. It is a journaling pamphlet PDF that the Collective Young Adult ministry printed for their spring retreat which you can download from here and take a look at: Collective 2024 Spring Retreat.pdf
Pre-Req
- Please make sure you checked the above Pre-Req's.
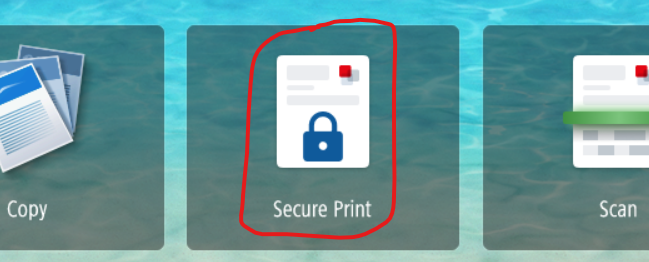
Secure Print Queue Method:
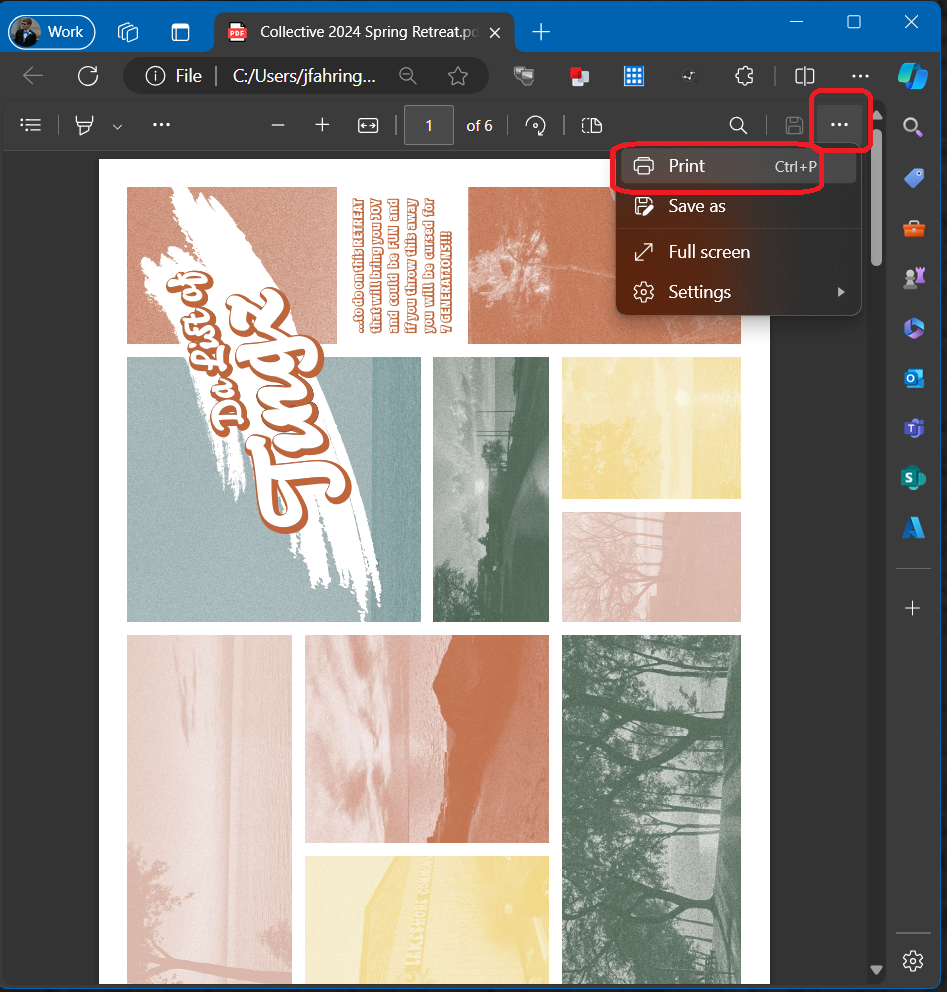
This is what we recommend everyone to use. This method applies to both Windows and Mac's. Open your favorite PDF viewing tool (Adobe Acrobat [without McAfee Security], Microsoft Edge, or Google Chrome should work) and load the PDF on it. Hit the option to Print or hit the Ctrl+P hotkey. Then, select the Secure Printing Input Printer and hit Print:
 |
 |
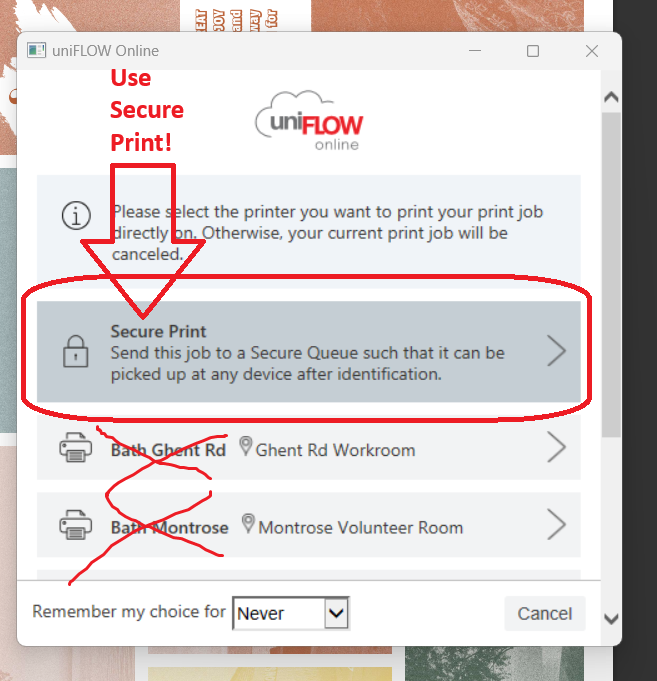
As long as your Uniflow SmartClient is initialized and running, this prompt will come up. For this method, please select the Secure Print option, and not any of the direct print options:
Then run over to the copier that has the finishing options you need. I'll use the Bath Office Downstairs Copier since it has Saddle Stitching (Folding and Staples). First we will be using the instructions above for loading up cardstock on the bypass tray. After that, login the copier with your PIN and then open the Secure Print app:
Find your Print Job you submitted (it will be the same name as the file name), select it to highlight it. And then tap Options.
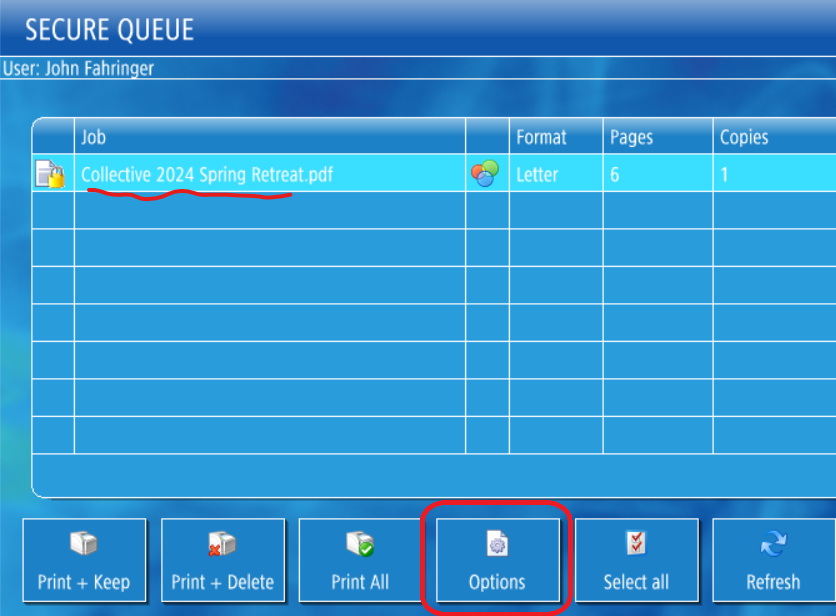
The Copier screen may now look something like this:
Ok, so let us try to investigate how the Booklet is prepared and is intended to print out. Take a look at how the booklet should come out as the final product with this handy GIF:
If we take a look at the PDF (Collective 2024 Spring Retreat.pdf), we will see it is structured a bit differently than what we might normally be used to for a word document. The PDF is setup for 3 physical double-sided 8.5x11in pages (6 virtual pages), with each page sectioned to where the page is to be folded (creating 12 booklet pages). Also, the virtual pages are rotated landscape on top of the physical portrait pages.
We need to fold between the sections using the fold line marked in red. When we are ready to print on the other side of the physical paper for double sided printing, we need to flip on the short edge to match the rotated state of the document. (The Below image points these out on the first page):

And then we repeat for each double sided physical page. When the physical page is fully printed double-side, it gets placed on top of the previous page. Once all pages are printed, the papers are folded and then stapled.
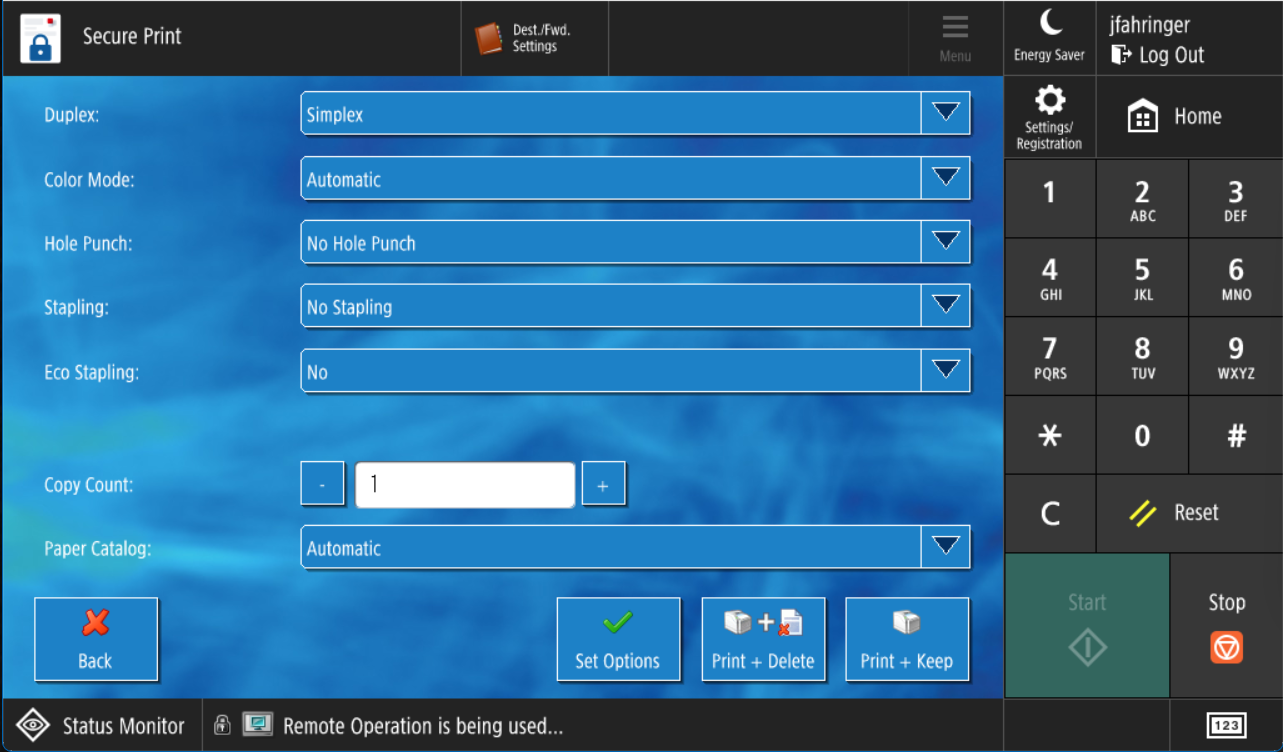
So for this project, we need to change the following settings on the printer:
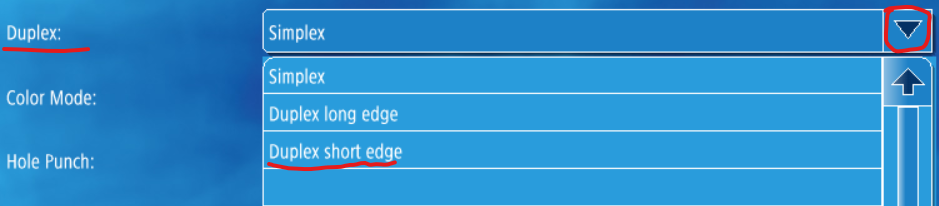
- Change Duplex setting to "Duplex Short Edge" (setting to let us print double sided by flipping over the short edge)

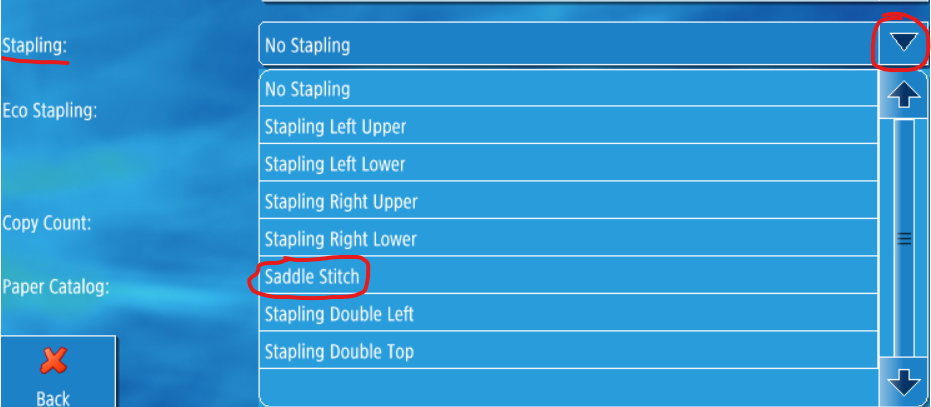
- Change Stapling to "Saddle Stitch" (this will fold down the middle line marked in red between the long sides of our document that we see in the above figure)
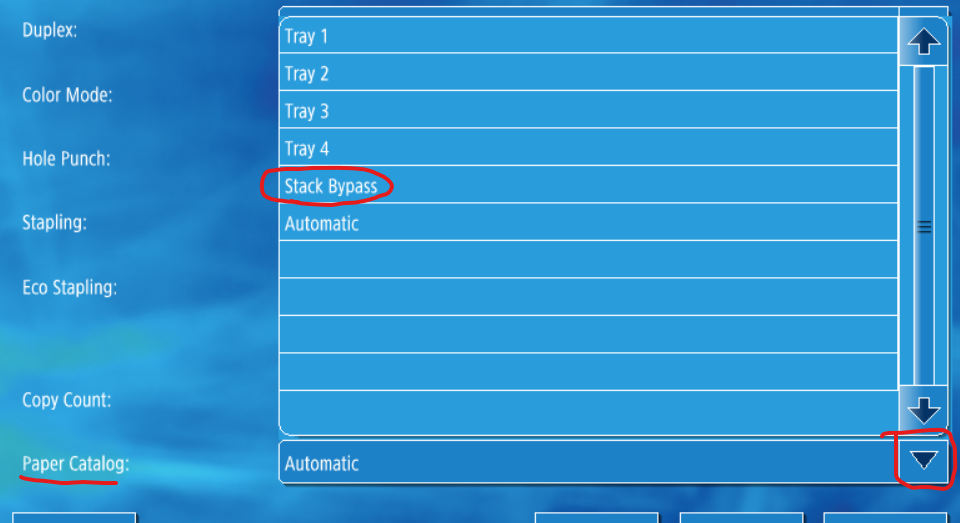
- Change Paper Catalog to "Stack Bypass" (this where we want to grab our cardstock paper from)

- Now we have this screen. Once all those settings are set, we can now do a test print before we execute all the copies we need. Set the Copy count to 1 to just do one copy, and then hit Print + Keep. Verify it comes out how you expect it, using the Bypass tray and everything else. Then select the Print Job again like we did earlier, highlight it and hit "Options". Make any necessary adjustments, change the Copy Count to the number you need, and then hit Print + Delete!