Sharepoint / OneDrive
SharePoint is the "Collaborative" version of OneDrive: The online Cloud Storage solution for working with other people. You can access anything from ToolBox resources, Campus files, to Department/Team files here. You can choose what you Sync to your computer through the SharePoint Site, and then the Syncing is handled by your OneDrive application running on your computer.
- OneDrive Application
- OneDrive Status Symbols
- Sharing and Managing SharePoint Link Access
- How to Sync and Favorite any of the Campuses Files SharePoint Folders
- When to Use OneDrive and SharePoint
OneDrive Application

OneDrive is the Cloud Storage Syncing application we use in our organization, for both PC's and Mac's. It automatically backs up your files under your OneDrive Folder on your computer and actively syncs any changes you make, whether it is made locally on your computer or in the browser using Office365. You can make changes to your OneDrive directory as you see fit either right from your computer or in the browser at https://gracechurchohio-my.sharepoint.com/ . You can always access your OneDrive either from your Computer through the application, through the webbrowser, or through the app on your phone. This has several applications. Currently we use Uniflow Scanning to send big scan jobs, that don't fit in a normal email, to a user's OneDrive.
The OneDrive application is also used to sync down any SharePoint Site or specific SharePoint folder you want! Check out how to do this here: How to Sync and Favori... | Grace Church KB (gracechurches.org)
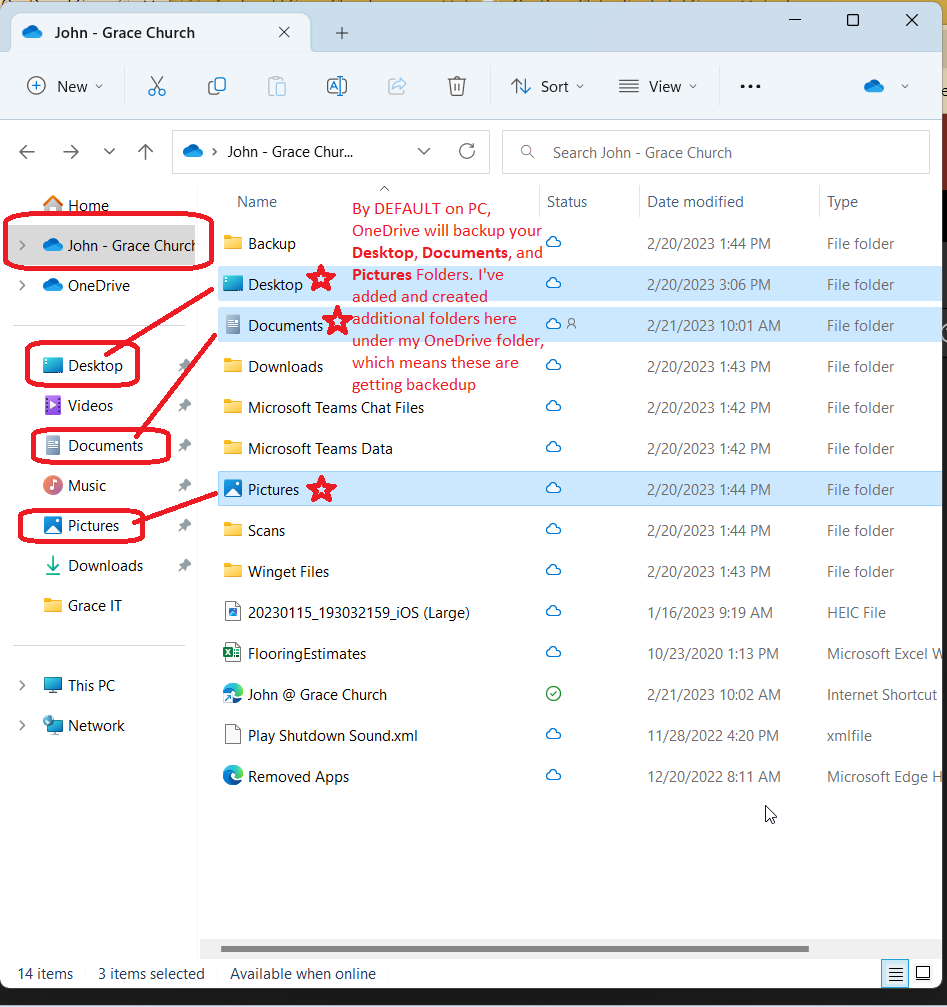
By default on PC's, OneDrive syncs up your Desktop, Documents, Pictures folders on your computer. You will notice these are also located under your OneDrive folder if you are using a PC:
PC View:
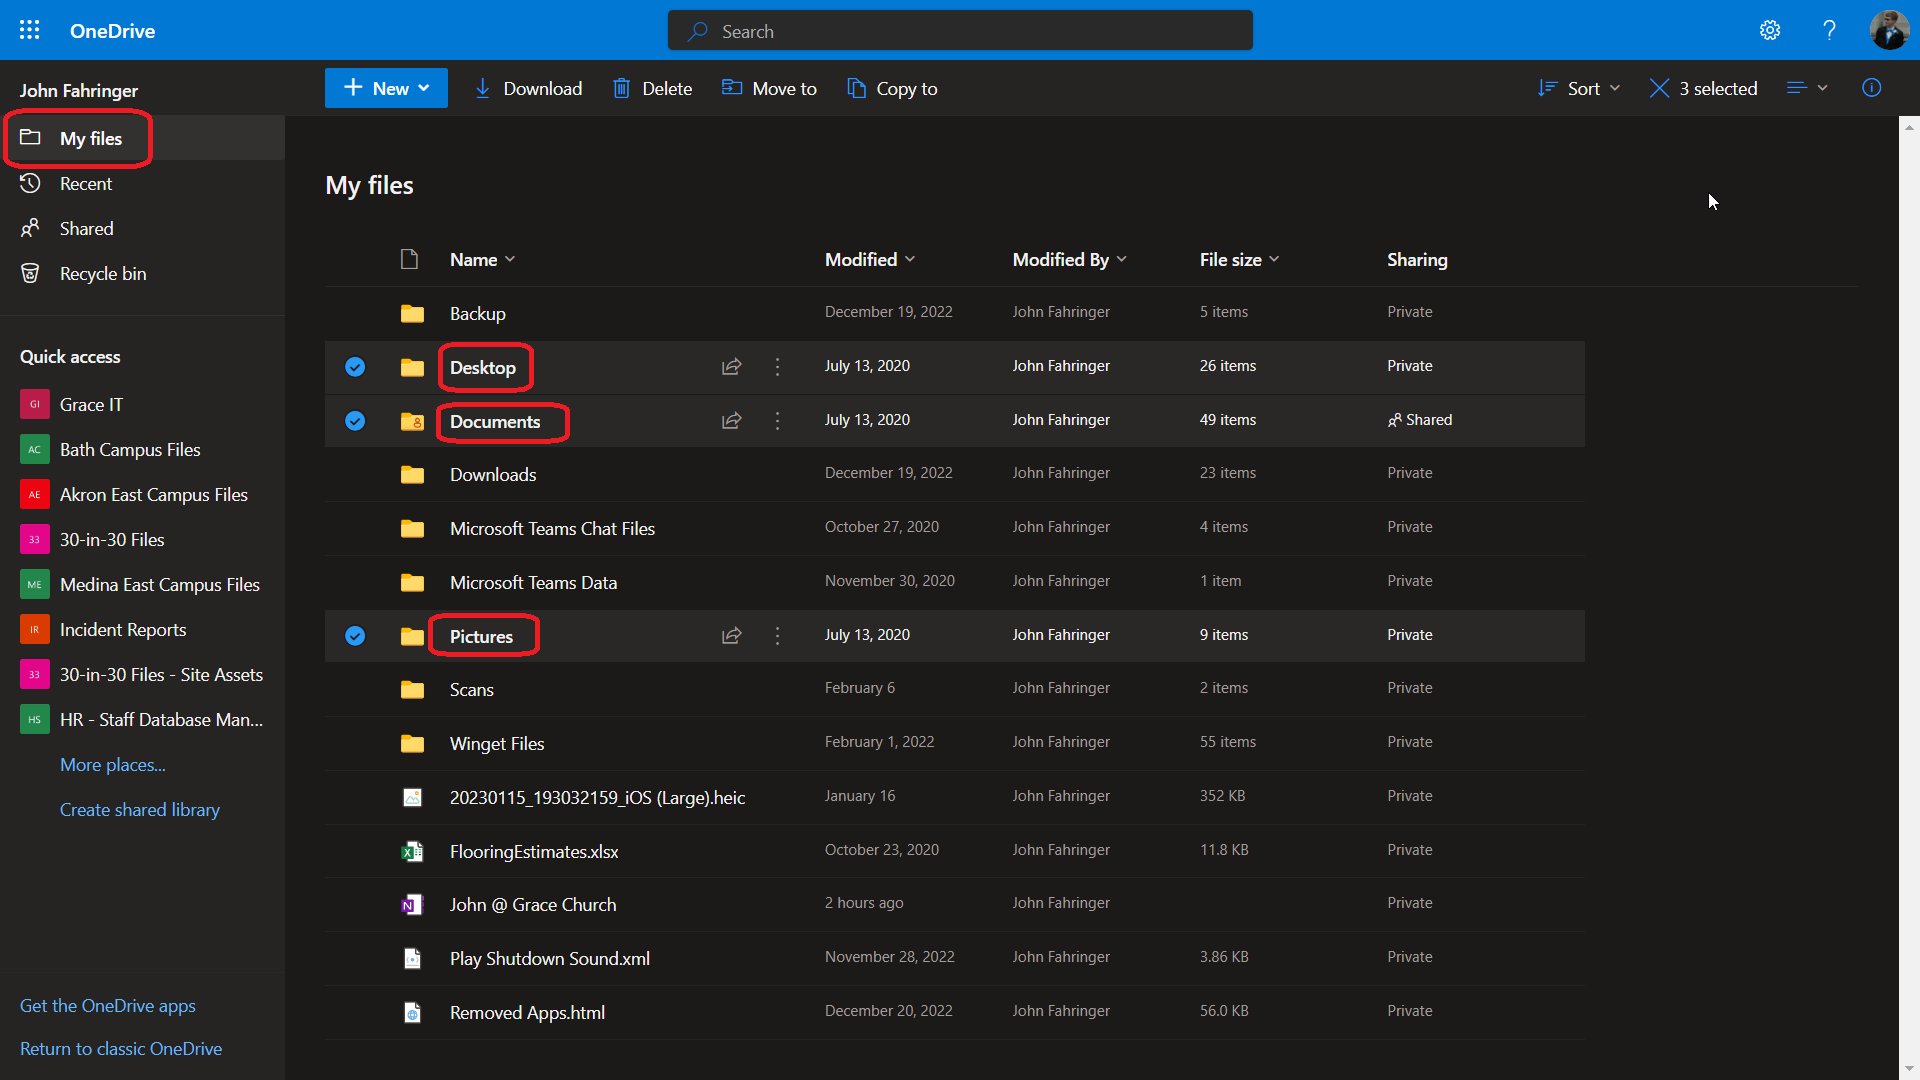
OneDrive ONLINE View:
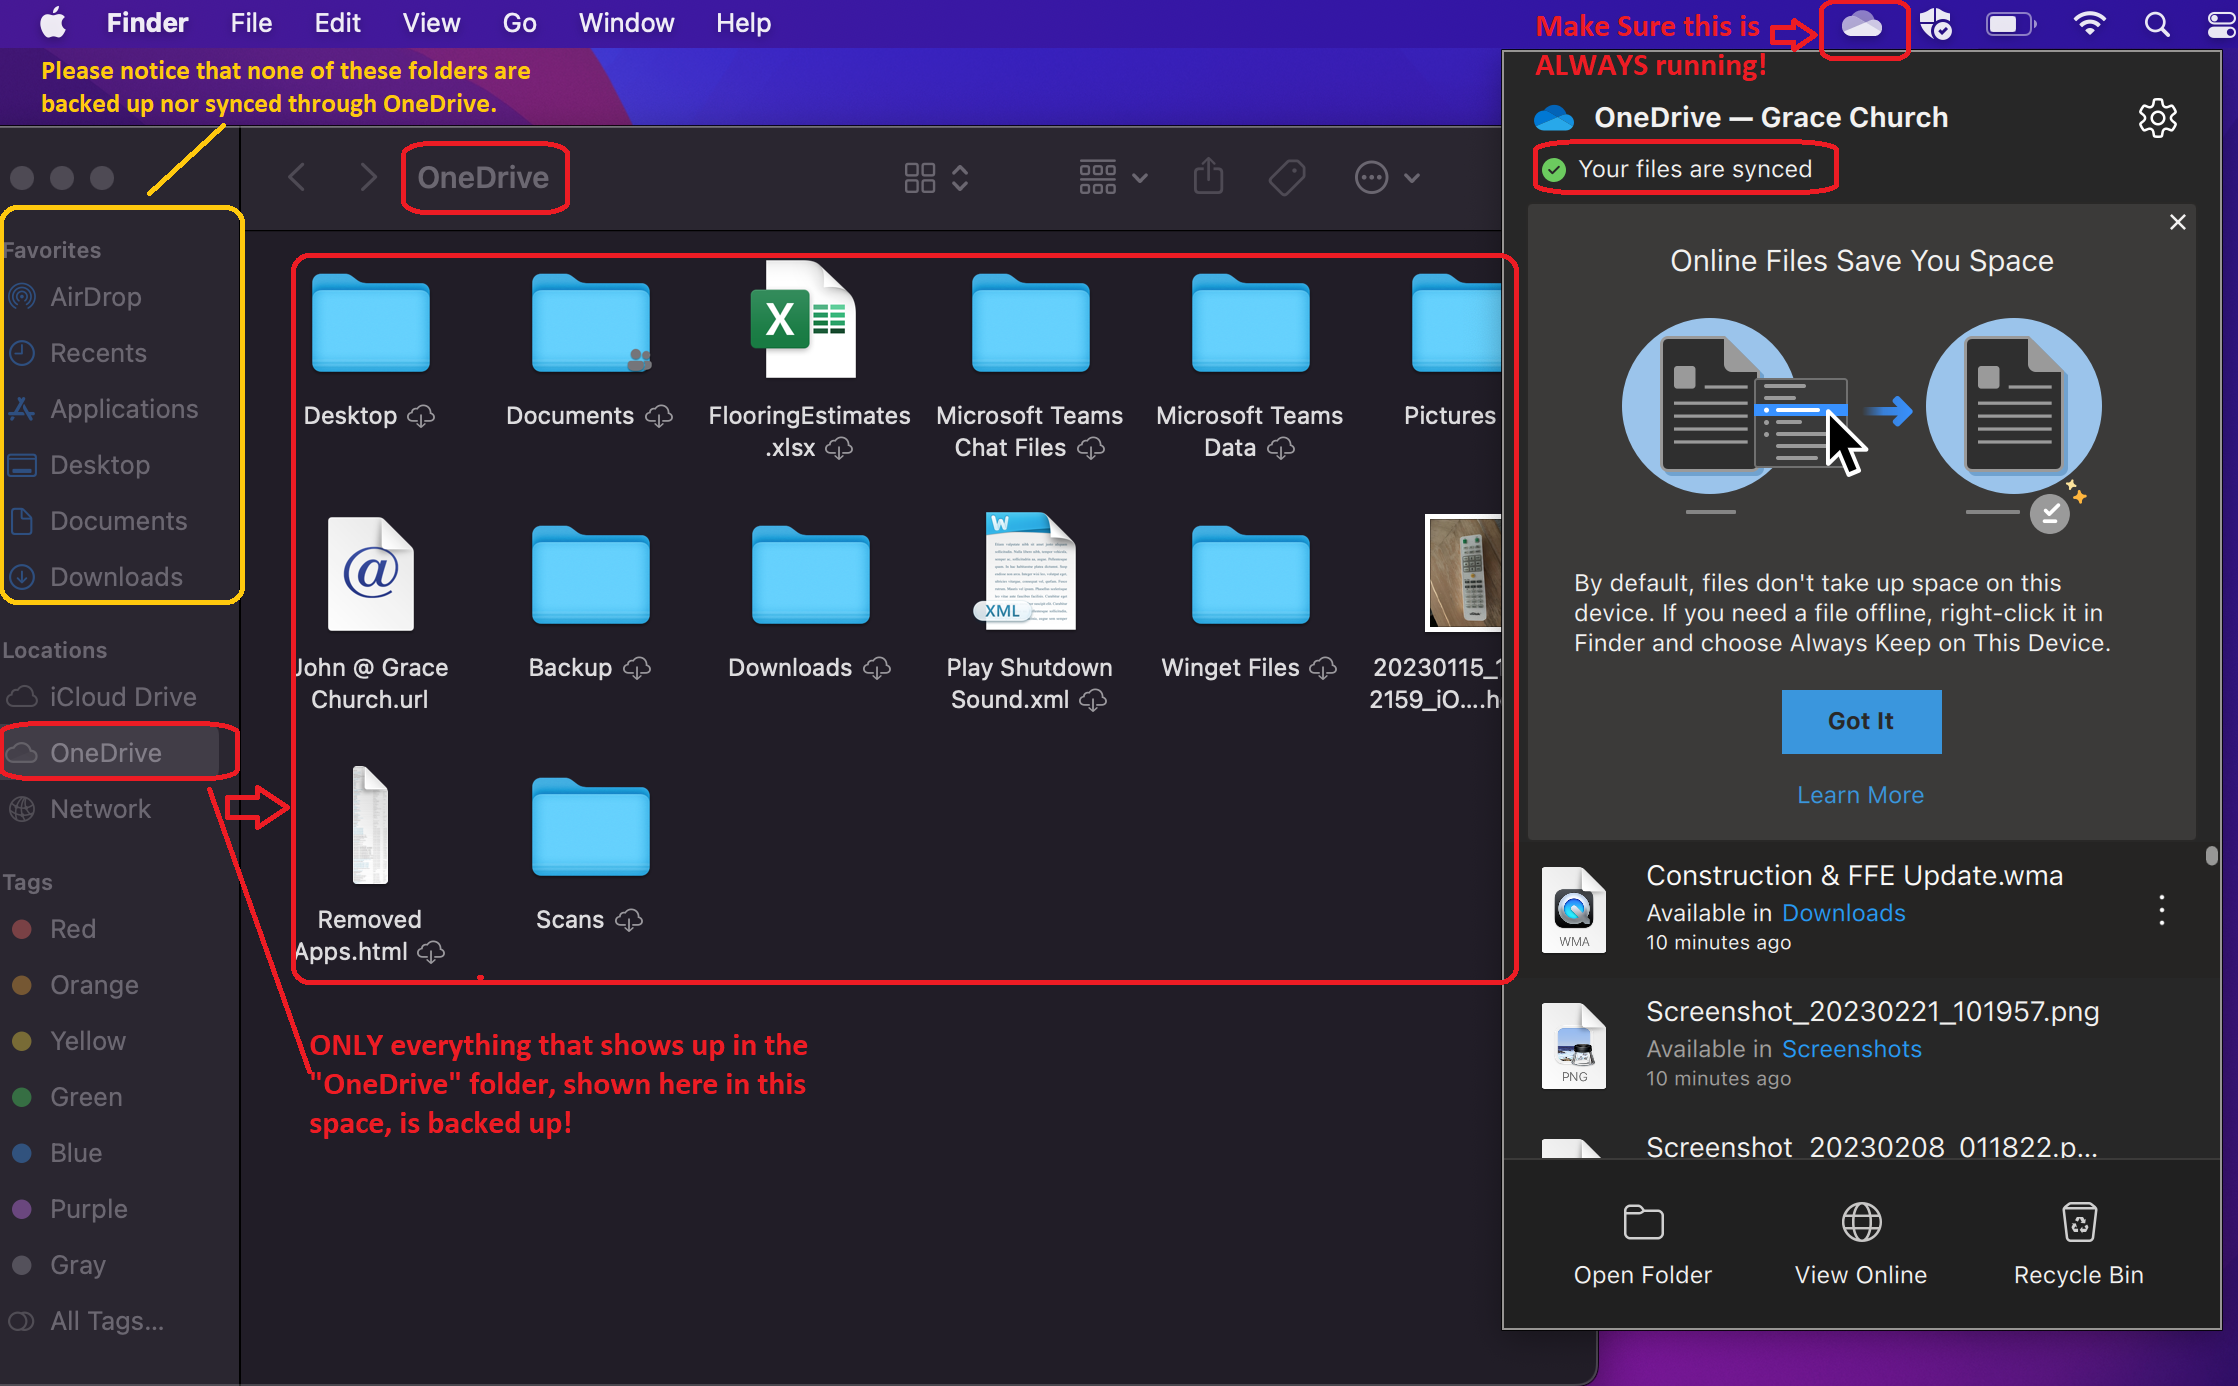
On MacOS, OneDrive currently does not automatically backup the Desktop, Documents, or Pictures folders. Make sure if there are files that you want actively backed up and synced that you are putting them in the OneDrive folder.
macOS View:
OneDrive Status Symbols
System Tray Icon for OneDrive

Always make sure that your OneDrive application is running on your computer. This ensures that your work is actively being backed up and changes are being pushed, both to either the SharePoint or OneDrive clouds. It is supposed to automatically start when you boot your computer and shows up in the system tray on your computer if it is running: it will look something like the above picture.
OneDrive Icons
Note that these icons show up ONLY when OneDrive is running on your computer. If there is a problem with OneDrive itself, these icons won't show up at all and your files are not actively syncing. If this happens, check to see if launching OneDrive from the Start Menu on Windows or Launchpad on macOS works for you. If not, you can try to reinstall OneDrive or ask Grace IT to assist.

You can check the status of OneDrive anytime by clicking on the system tray icon for OneDrive:

Sharing and Managing SharePoint Link Access
Sometimes it's useful to share files/folders with another staff member or even an user outside of staff. Sharepoint has this ability.
Disclaimer: Be careful that you aren't sharing anything sensitive with users outside the organization. If you have any doubts or questions, please ask IT.
To give access to edit a file
While staff typically have access to read and edit files within their campus SharePoint site, you will only be able to view files on other SharePoint sites (if it's a file like a Word doc or Excel sheet, you can open it up in a desktop app and save a local copy if you are wanting to borrow another file from a different campus) In order to collaborate and edit a file within SharePoint the owner of the file or folder will need to add your Grace Church account to have editing access.
- Find the file or folder on SharePoint. Right click it and select "Manage Access."

- You'll see a small window pop up in the middle of your screen. In the top right corner of that window click the person icon with a small plus sign.

- Add the people the you wish to have access to that file or folder and make sure they are set to "Can Edit" (pencil icon)
If you're looking for a volunteer to upload or edit files within a folder, you'll need to be sure to set the sharing link to edit instead of view. They will also need to sign into or create a personal Microsoft account to gain access. Be sure you are not giving access to a large amounts of files (ie the entire 30-in-30 SharePoint site) but instead very specific files or folders. Best practice is to set a password at the very least and ideally an expiration date.

- When you have everyone you'd like share the file with, you can type up a quick message to let them know what they have access to as well as select the "Notify People" box to send them an email once they have access.
- After double checking the people added, click "Grant Access" to share the file/folder with them.
(To share a file with anyone) To Share a link for view:
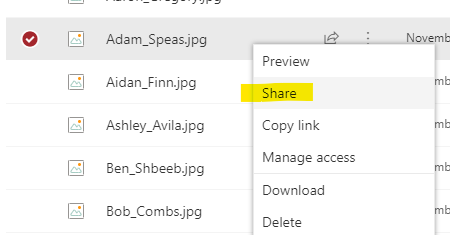
- Find the file on Sharepoint and right click and select Share:

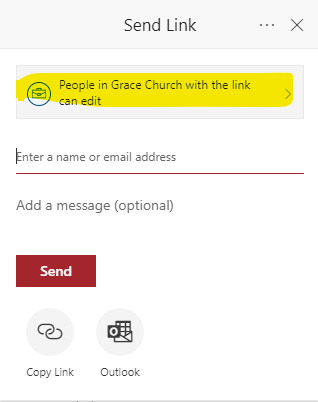
- A Send Link Window will pop up. Select the top button highlighted below:

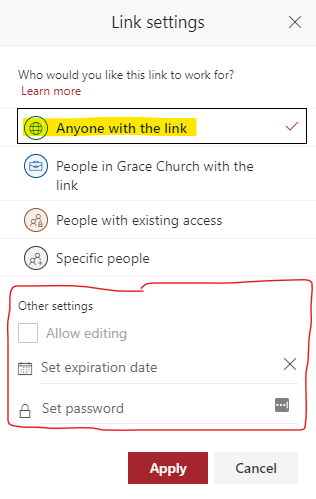
- In the Link Settings Window Select Anyone with the link. Consider using and expiration or password to add a little more security if needed.
Then click Apply
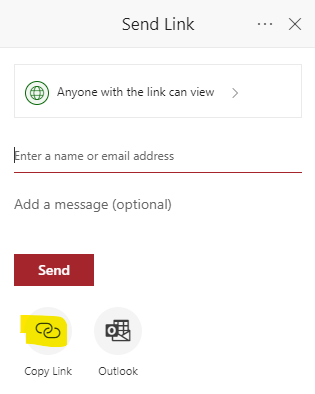
- Finally, click Copy Link to copy the link.

- Now you can paste this link in an email or use it to share a file on the website.
How to Sync and Favorite any of the Campuses Files SharePoint Folders
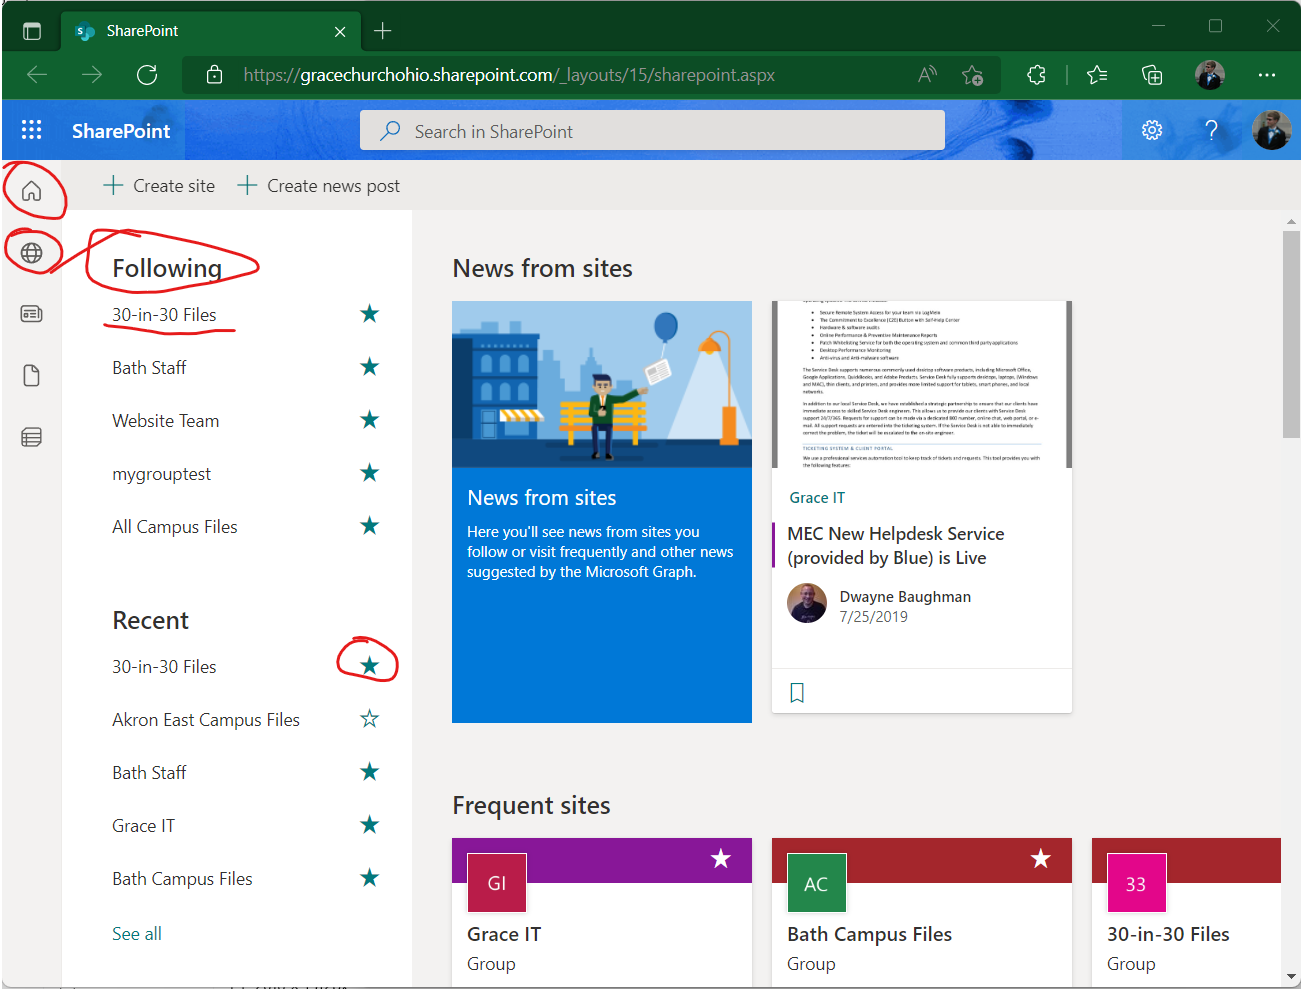
Favorite a SharePoint site
If you work with SharePoint or OneDrive files enough in the web browser, you may want to favorite a SharePoint site so that you can easily pull up your favorite site and not waste time typing it in and trying to search for it.
We recently made a change to our Campus SharePoint site. Now instead of one SharePoint site holding every campus, we split the site up so that each campus has their own Site. When you goto the 30-in-30 Files or any of the other campus sites, you will now see a Navbar with links to each of them!
Now it will appear in your main SharePoint "start page" (SharePoint), or "your sites".
Sync from a SharePoint Site
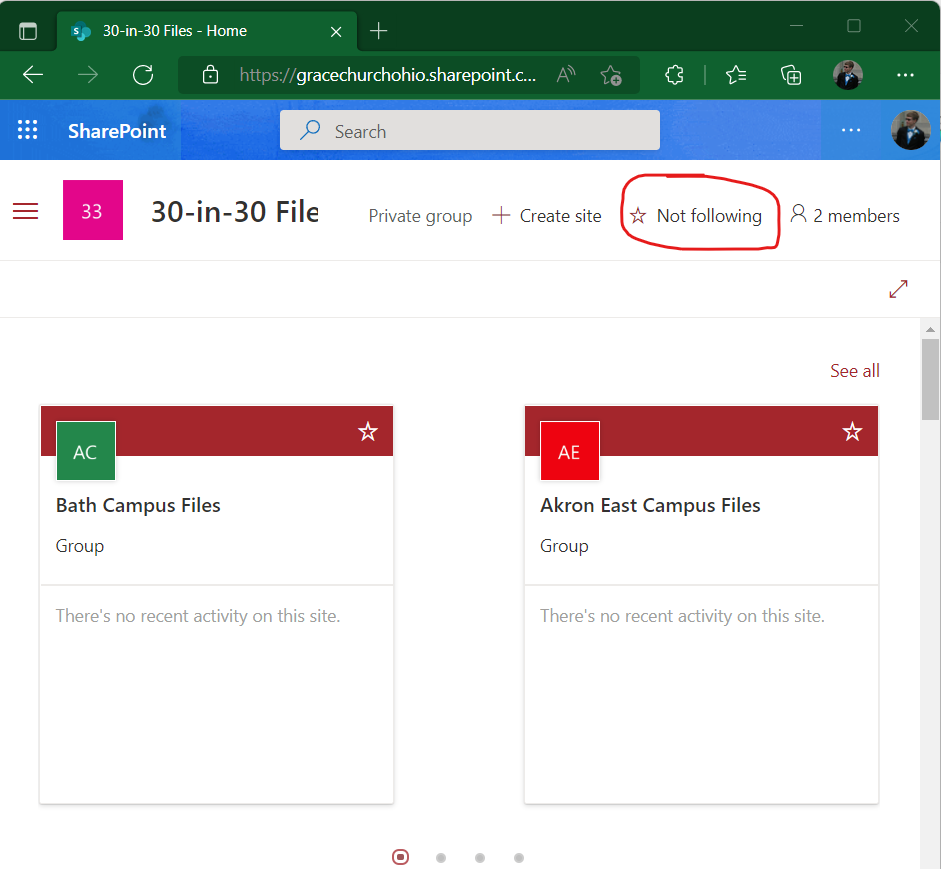
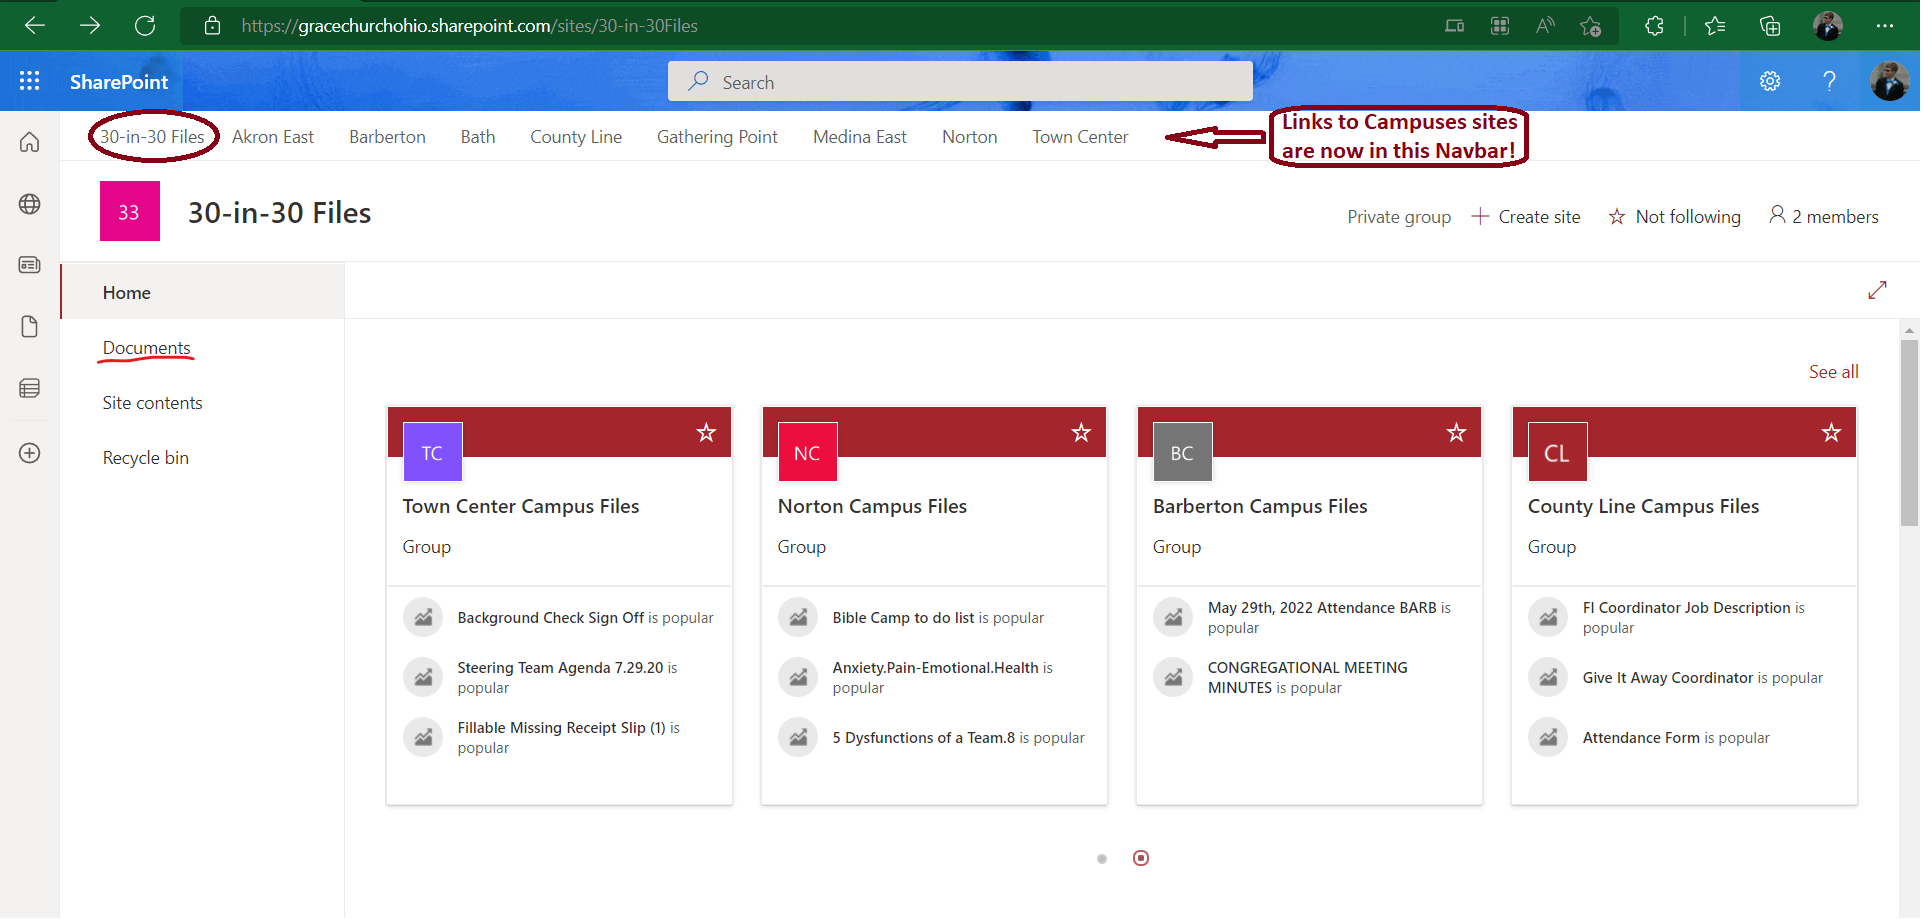
This guide explains how to sync files or folders under the campuses SharePoint sites. to your device. The example shown is done on a Windows PC syncing down the 30-in-30 Files site, but the flow is very similar on MacOS. This process is similar to syncing other specific SharePoint Sites/directories as well. You can reach the 30-in-30 Files SharePoint site here. It will look something like this:
We recently made a change to our Campus SharePoint site. Now instead of one SharePoint site holding every campus, we split the site up so that each campus has their own Site. When you goto the 30-in-30 Files or any of the other campus sites, you will now see a Navbar with links to each of them!
Please note that the syncing of SharePoint files in this manner is handled by the OneDrive application running on your computer! Because of this, make sure that OneDrive is running so your work is saved and synced up!
Since we want to sync files from SharePoint, we need to click on Documents. This will show us the files that are associated with the site. The site will now look like this:
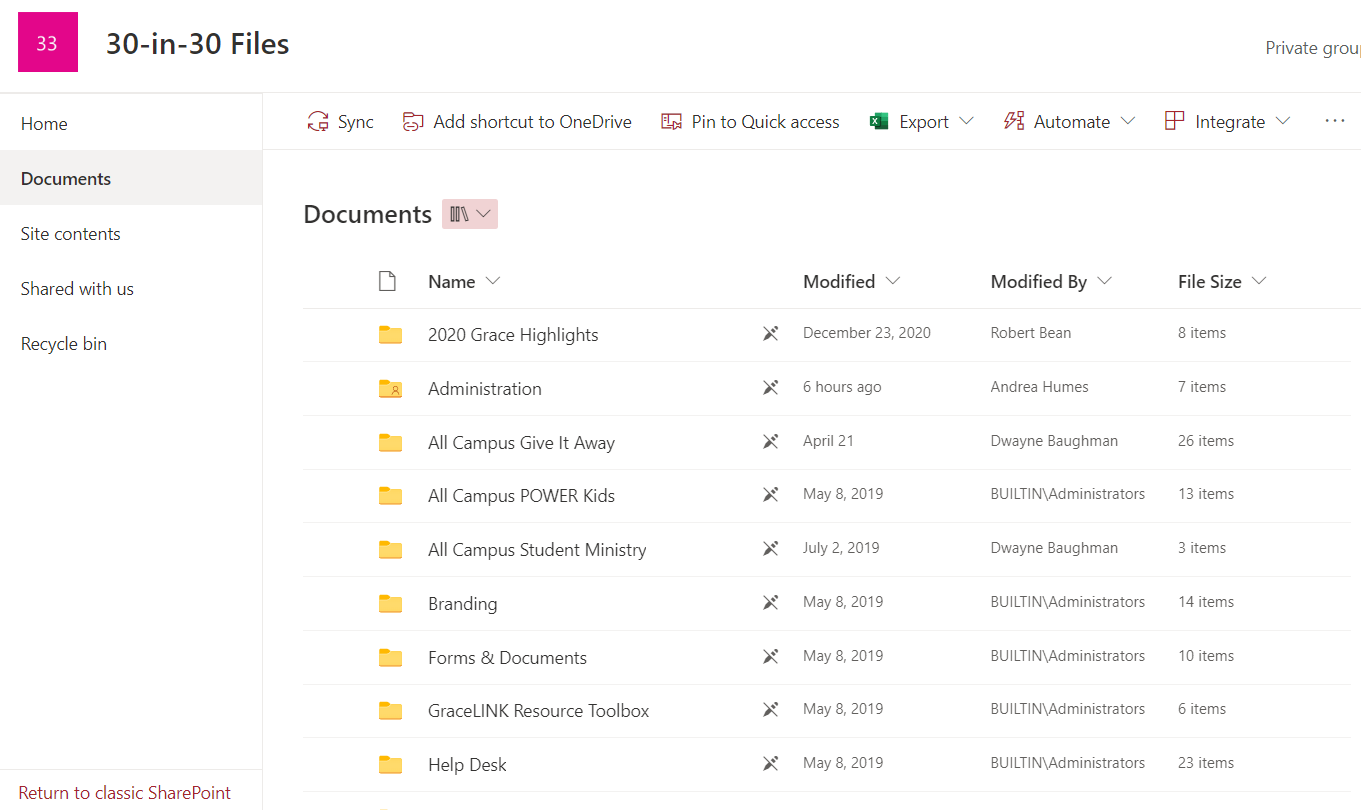
This is everything under the 30-in-30 files SharePoint folder. To sync it all, we can click Sync.
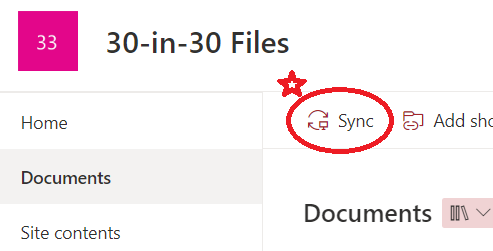
This will make a request to use OneDrive, so make sure that OneDrive is running in the background.
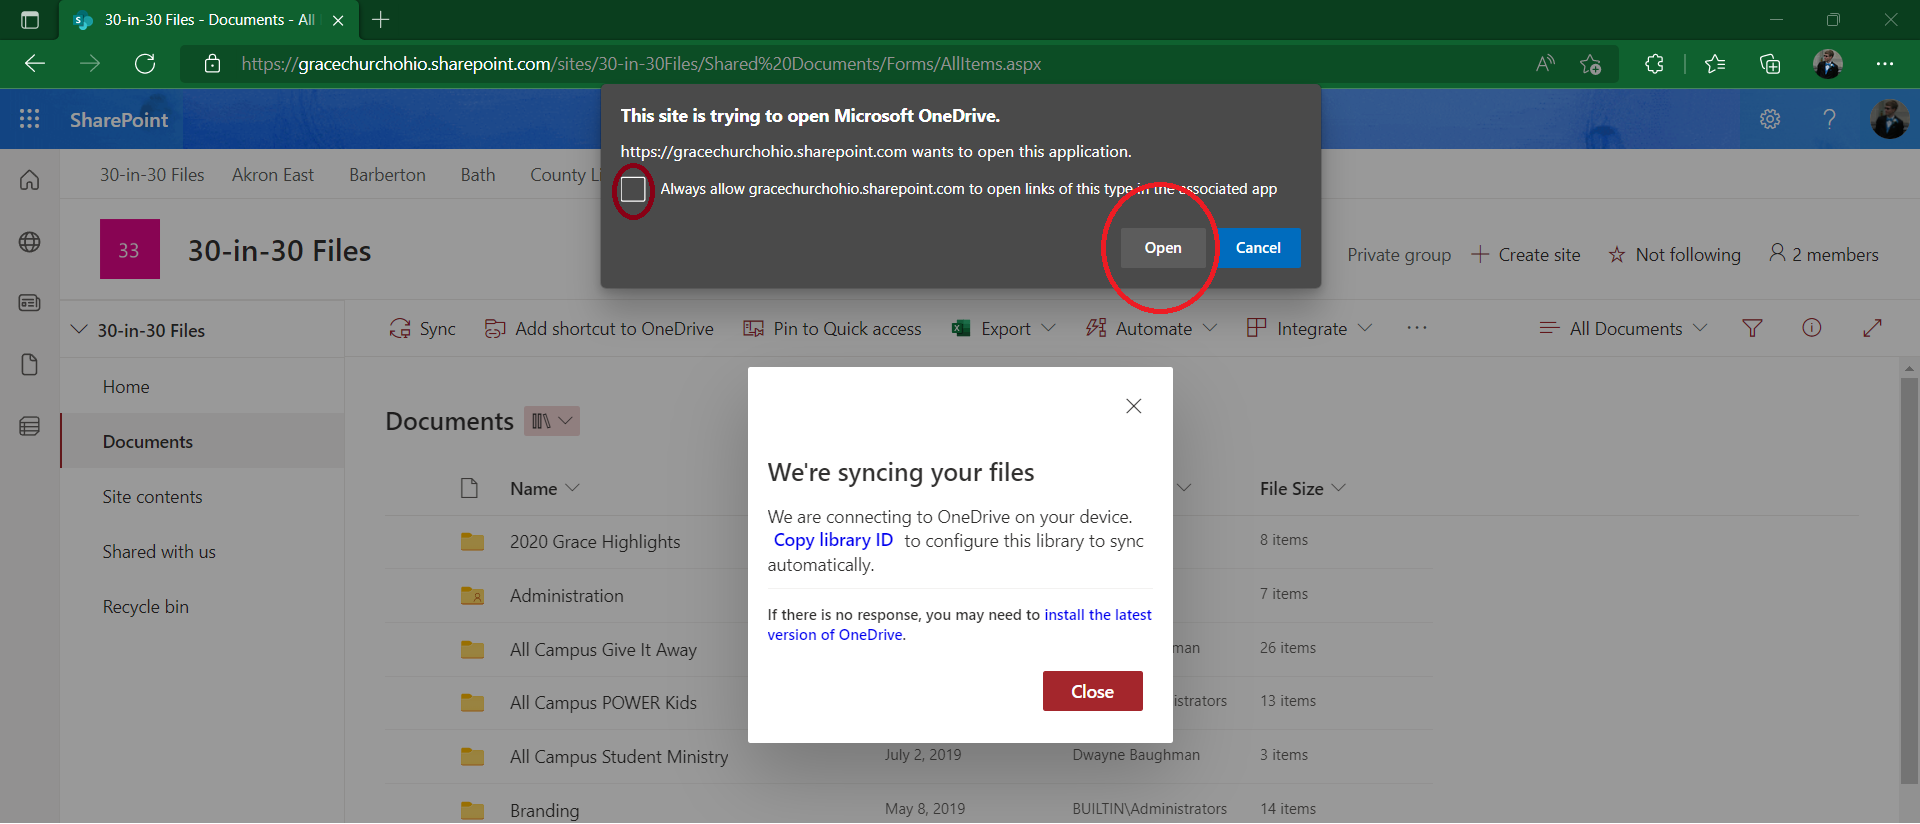

If you don't see the OneDrive icon shown above the application is probably not running. Please press the Windows Key on your keyboard and type OneDrive and hit enter to load it up.
Now in Windows Explorer, this shows up under my list of SharePoint Sites as 30-in-30 - Documents. The SharePoint sites you sync will appear above your OneDrive folder in the navigation pane of Explorer.
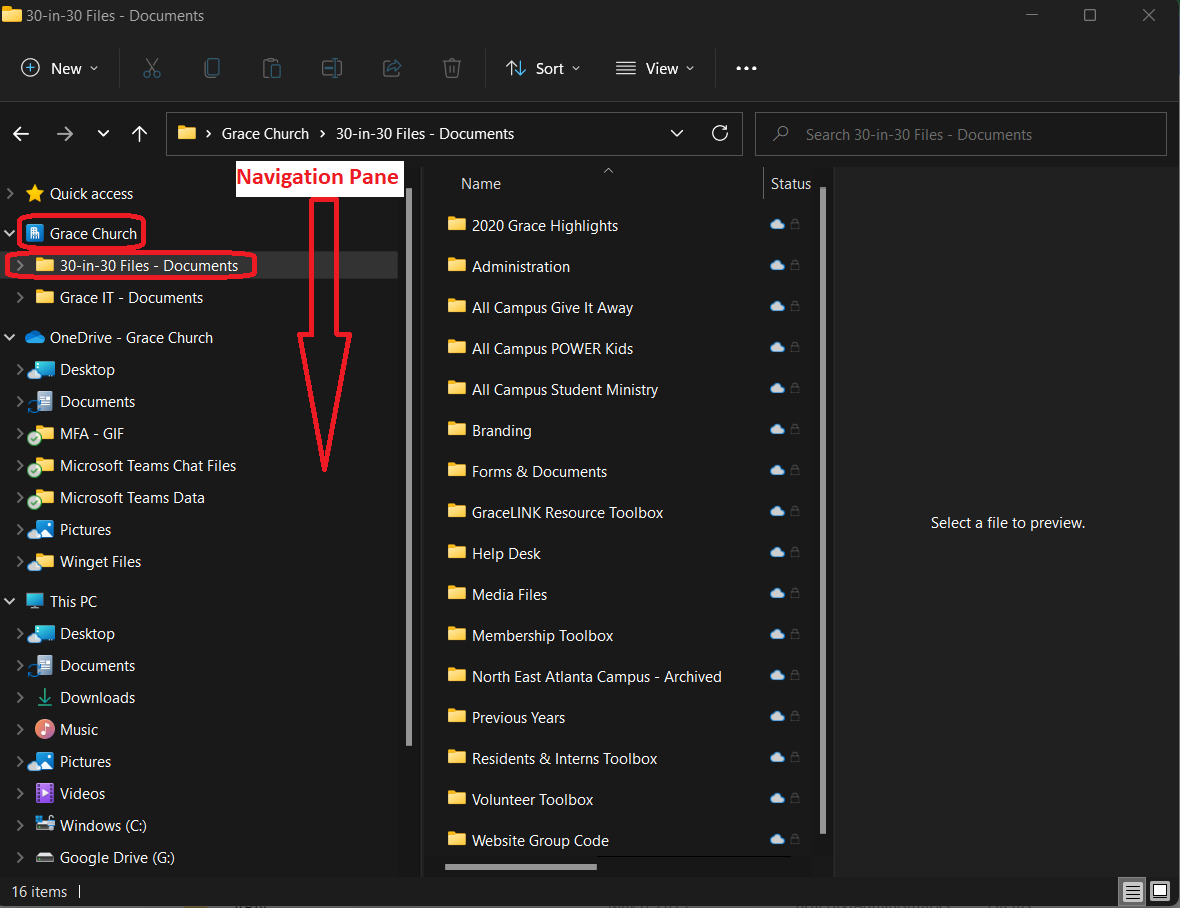
You are now Syncing the 30-in-30 SharePoint Site!
Pick and Choose to Sync specific content in a Site.
This process is optional, but may be beneficial for you if you want to improve Syncing performance on your computer and customize exactly what you want to sync.
You may be interested in only syncing select content under a certain folder of a Site and not having to worry about syncing the rest of the Site files that you won't be accessing at all. This might be useful for bigger Sites like the Bath Campus site if you don't need to be syncing down things like media files which can be taxing on your computer whenever a sync occurs.
To sync only certain folders under a site, there are a couple ways of going about it. I recommend the first method if you are interested in only one or two folders/files for a site. The second method is better for granularly choosing several folders that are nested or unnested, and is helpful in preventing cluttering up your list of syncing SharePoint sites in the Windows Explorer navigation pane. This method is also helpful when you already have a Site synced to your computer, but you decided you don't need to use as many files.
-
METHOD 1
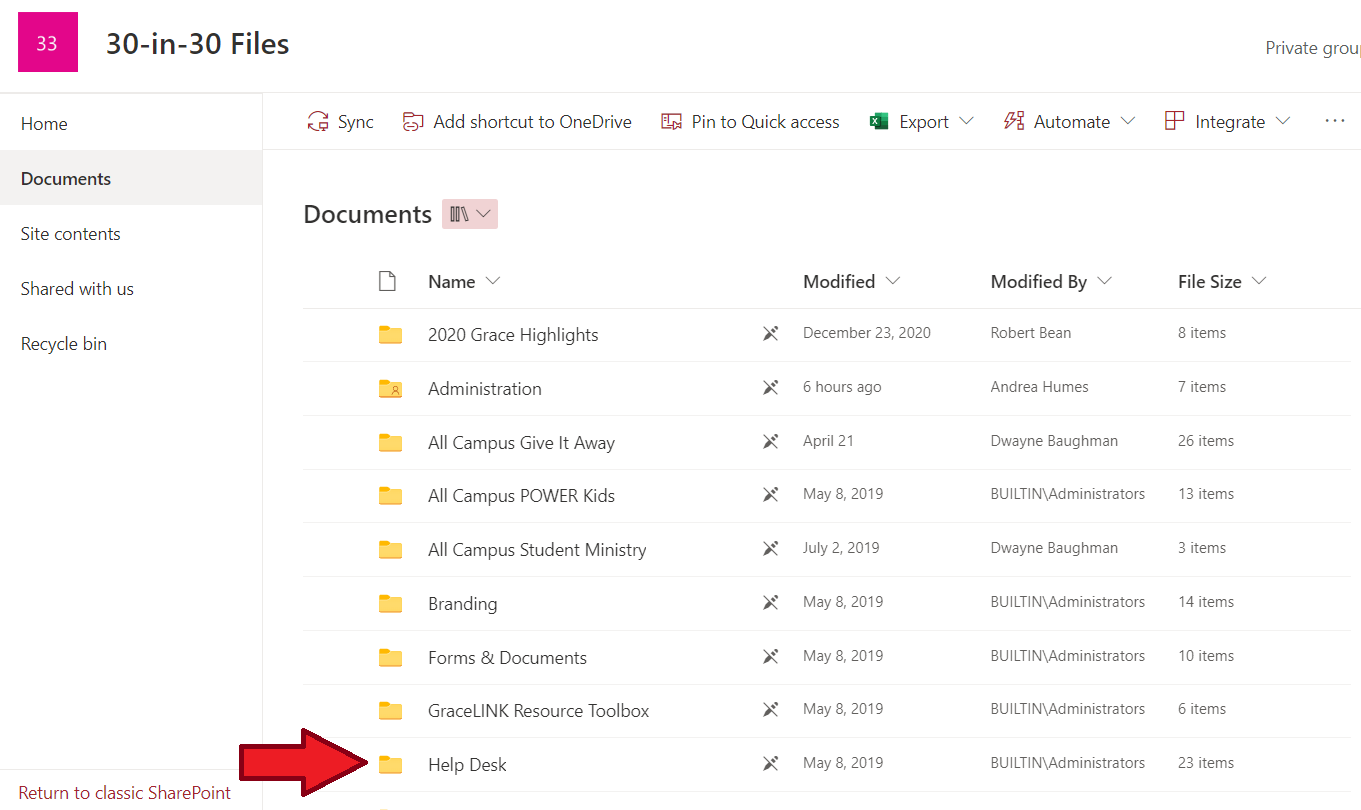
While still in SharePoint, navigate to the folder/file that you are interested in syncing with your computer. For example, I am interested in the Help Desk folder in the root directory of the 30-in-30 files Sharepoint site we are still in. Click on that folder to open up what is inside it.
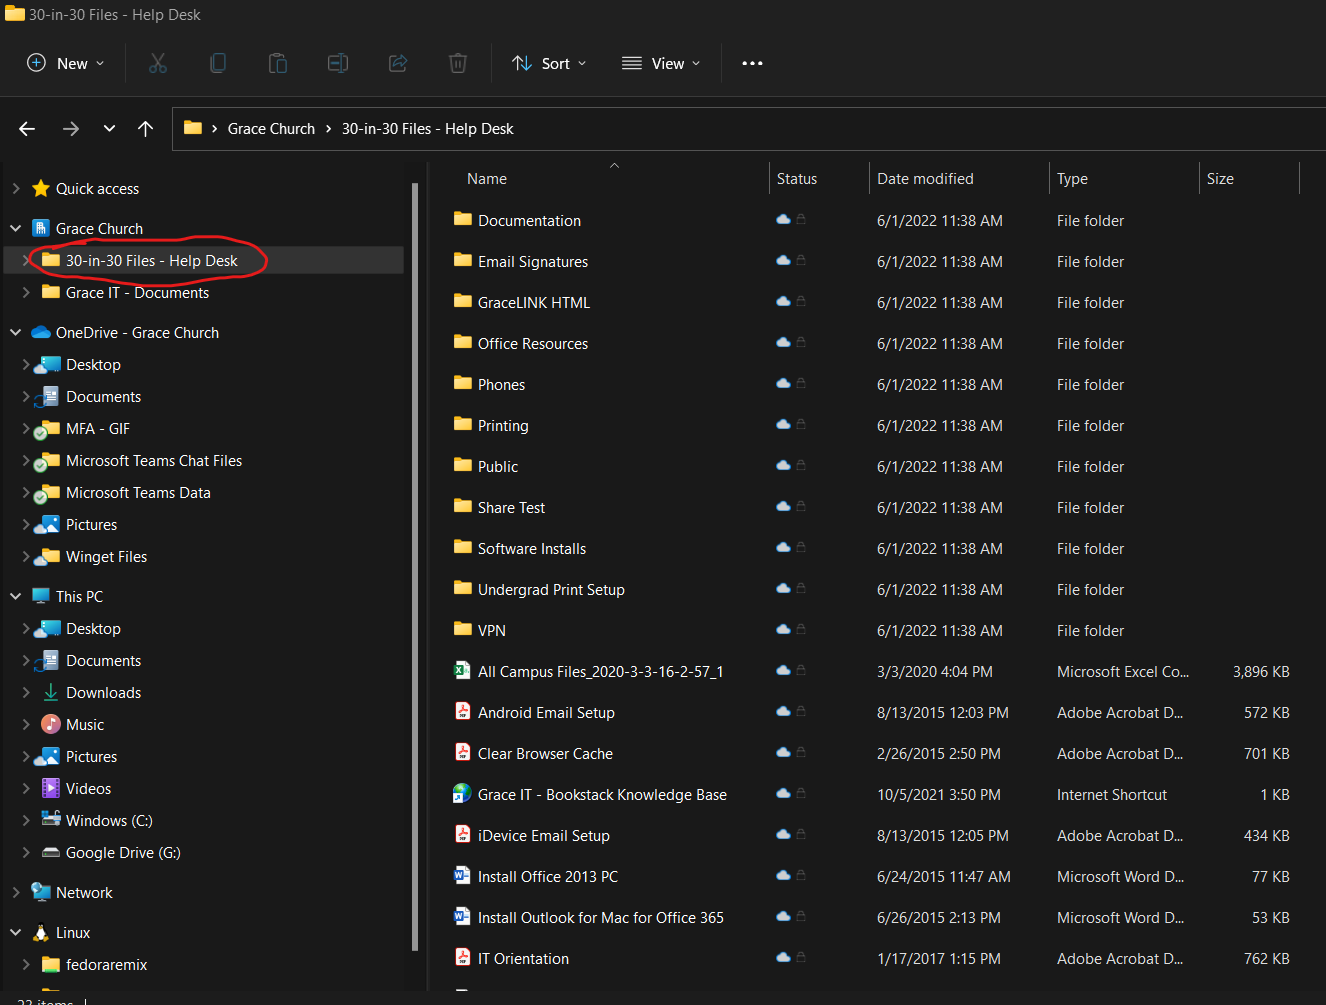
Then all you need to do is click sync and it will start syncing just that folder to your computer. It will show up as the SharePoint site name followed by a dash and the folder name:


-
METHOD 2 (Takes more Time)
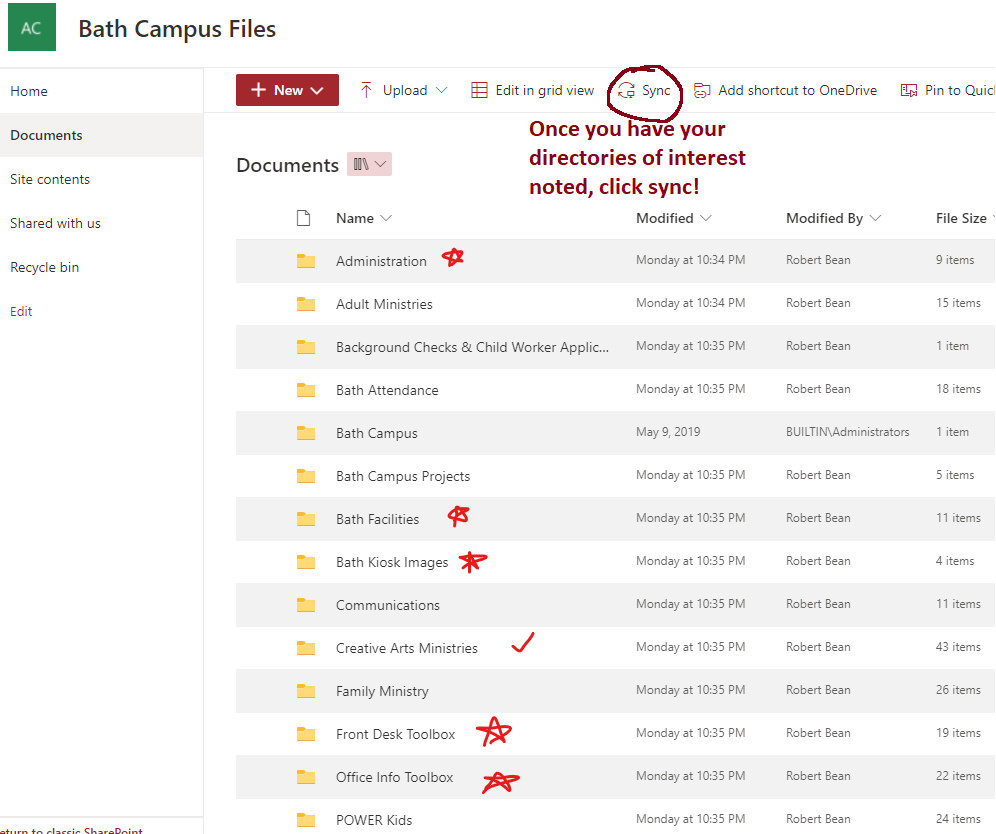
The second method has you make changes in OneDrive settings. If you haven't already synced the site, Proceed with syncing the site that you want to sync stuff from. I'll be showing how I customized what I sync from the Bath Campus site. Peruse through the site to figure what you want and keep a note of it somewhere. Once you have an idea of what you want to be syncing and not be syncing, click Sync from the root directory.


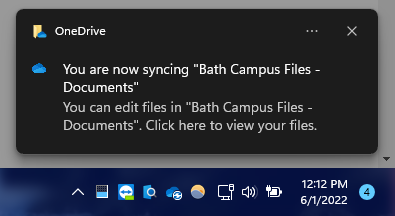
This will now start syncing the whole Bath Site to your computer. Since we are interested in syncing only a select choice of items from the site, its a good idea to be plugged in to power when doing this because we are going to be downloading the entire campus folder, and then we offload the folders we don't want. Unfortunately, with this method at this time you cannot tell OneDrive to not download the whole Site so this may take some time.
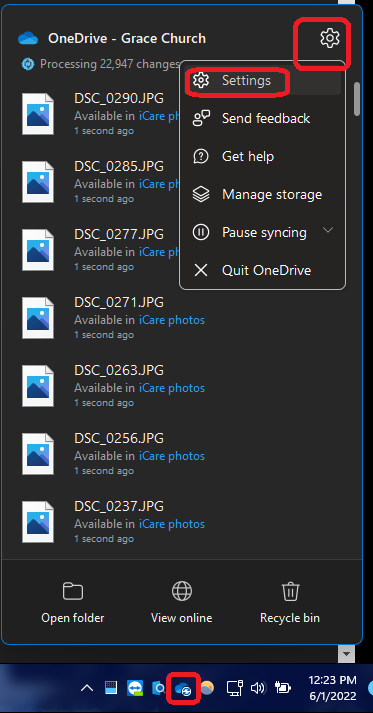
We are going to proceed to the next step which is choosing which select folders we are interested in syncing. Right click OneDrive in the Taskbar and click settings. You'll probably notice before clicking settings that OneDrive is pulling down all the SharePoint files.
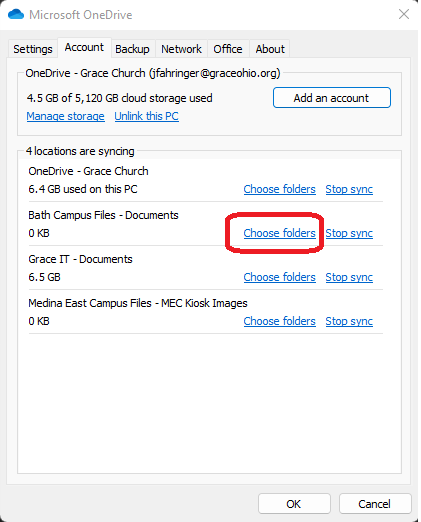
Next Click Choose Folders next to the SharePoint site you are syncing from. In this case, I am syncing from Bath Campus Files - Documents.

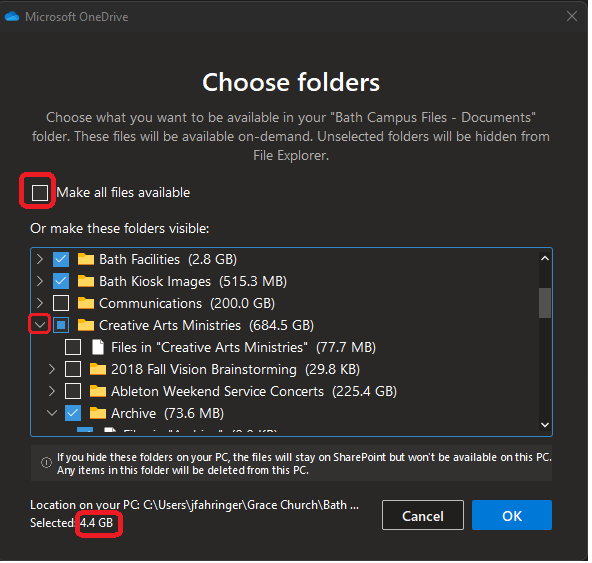
In the window that pops up, you can customize exactly what you want to sync down. You can expand directories to choose specific folders you want and don't want. Unchecking a folder unchecks every subfolder and subfile of that folder for you, and checking a folder will check every subfolder and subfile of that folder for you. You can start from scratch and uncheck everything by unchecking the Make all files available box, if you want. Check any folder that you want synced and uncheck any folder you don't want synced.
Notice how much storage you will be saving while you are customizing. The Bath Campus site as a whole was measured to be about 1200 GB large, but I selected only about 4.4 GB of what I need from there. This will dramatically improve the performance of sync jobs going forward compared to if you were syncing an entire site:

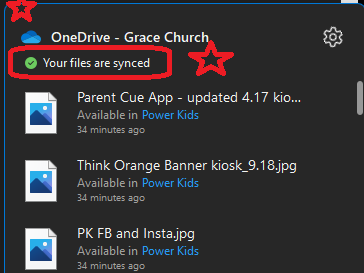
Important: You will have to wait until the current Sync Job is finished before you hit OK in the Choose folders prompt (See Above picture of Prompt) or reboot. If you click OK or reboot while you are syncing or while OneDrive is trying to Sync, OneDrive will complain and force you to choose your folders again. Wait until you see Your files are synced in the OneDrive status menu like the one shown below, which you can open up by right clicking on OneDrive in the TaskBar:


You will have to wait until any Sync jobs in progress have finished before clicking OK or rebooting. (See the note above) Once you have chosen what you want to be syncing AND no sync jobs are going, click OK. This should start removing any unchecked folders from your computer! Depending on the size of the site/amount of content you are desyncing, this may take a while too, so be prepared to leave your computer plugged in to power.
When to Use OneDrive and SharePoint
Check out this video: Video Player (microsoft.com)
- Your individual work, such as files that include private info.
- Early drafts of file that you don't want to see yet, You can move them to Sharepoint later when you are ready to move them available to the team or org.
- Team Project Files.
- Any resources that should be owned by the business or group even if you leave the organization.