Collaboration
Ghent Mondopad Setup - Community Room
The Mondopad (also known as the Zoom/Video Conferencing Station) is a transportable system that enables internet conferencing. It consists of a mounted computer and remote controlled pan-tilt camera, keyboard and mouse, TV, bundled ethernet cable, battery powered speakerphones that can play and record sound, and charging cables to charge them.
Preliminary
- Currently, one unit lives in the main building and is stored in classroom C between the TV and wall. Another one lives in the Student Center and is stored in the closet of the Student Center Auditorium. If your event is in the church building, please use the one stored in the church building. If your event is in the Student Center, please use the one stored in the Student Center.
- Check to see if the Unit you need to use is reserved or not on GraceLink. Please first check and reserve it there, or receive permission from our Facilities Manager before setting either Unit up.
Setup
I.E. Community Room:
- Move unit up the isle in front of closet to the second row of tables. Ensure there is a clear view to speaker location
- Plug power cord into to outlet to left of closet door.
- Plug one end of CAT 6 ethernet cable into PC and then run cable through door next to closet and into kitchen area. Plug other end of cable into wall jack to right of door as you enter room next to refrigerator.
Power On and Running Zoom
- Power monitor on, power button is on right edge of monitor at the bottom
- Power PC on
- Log into PC
- user: Zoom
- Password: Meetings4Grace!
- Get the 2 speakerphones from the shelf
- Place one on the speaker's table in front of room
- Place the other on one of the tables
- Start Zoom application
- Log into Zoom
- user: 30in30zoom1@gracechurches.org
- Password: Meetings4Grace!
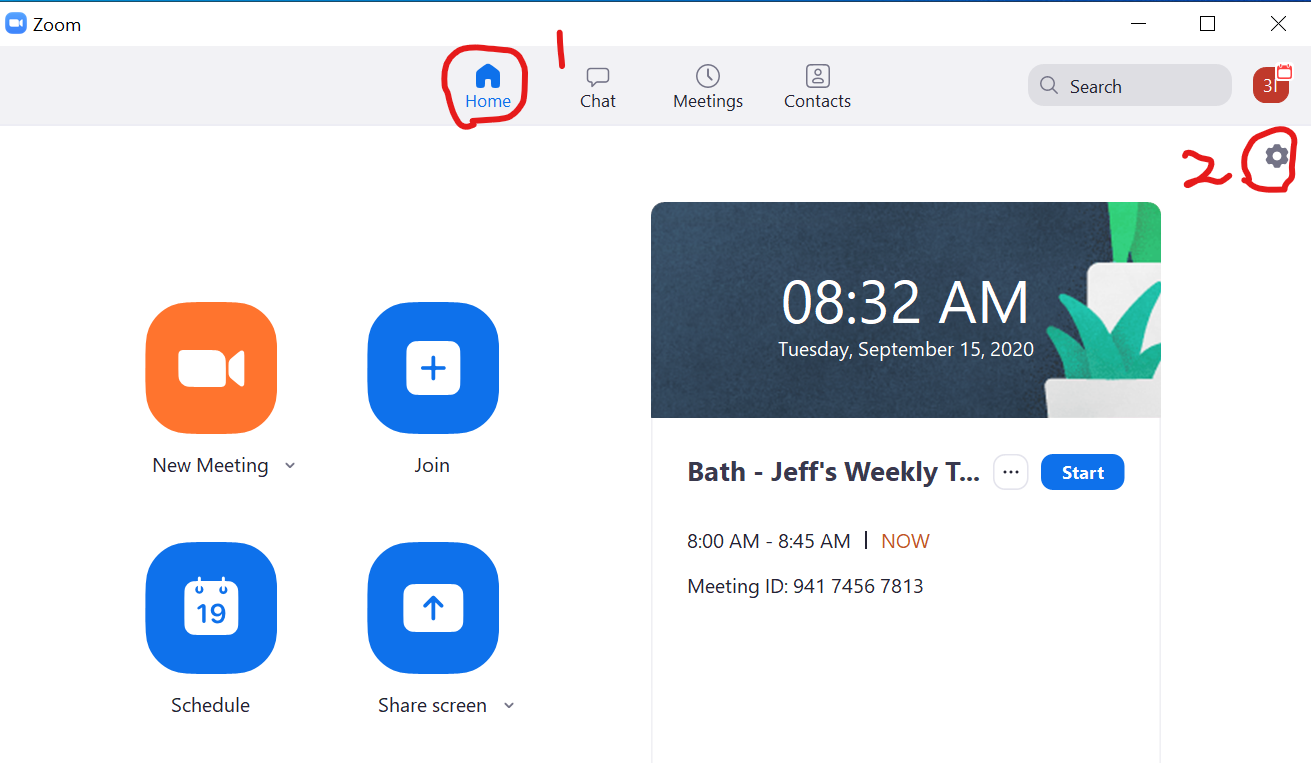
- Select (1) "Home" from the menu
- Then select the (2) settings gear in the tope right corner
-
 Inside the setup menu, select (1) "Video".
- use the camera remote to align and zoom the camera in on the speaker location
 I
I
- Inside the setup menu, select "Audio
- Then select (1) "Test Speaker" verify you can hear sound out of both speakerphones
- Then select (2) "Test Mic", speak into the speakerphone at the speaker's desk and then wait for it to play back. If it sound ok then you are done with video and sound
- Close the Settings window by clicking the "X" in the right corner.

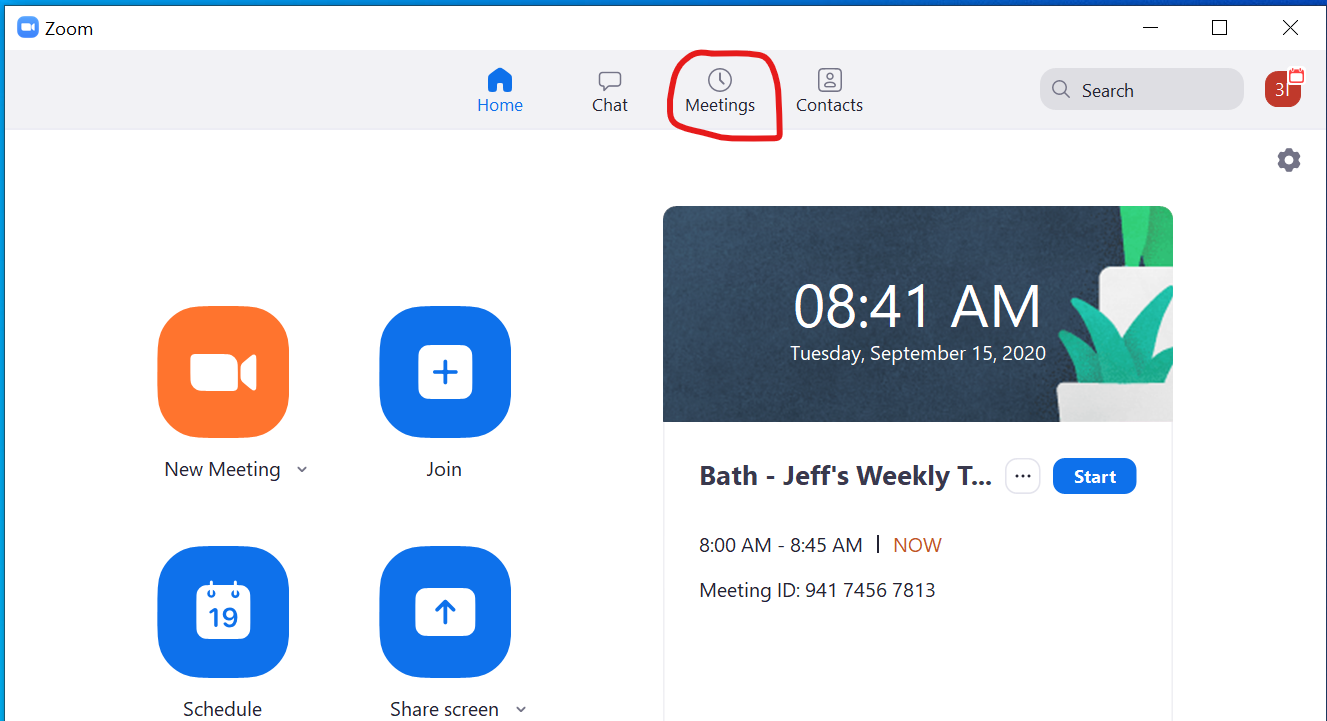
- From Zoom "Home" Screen select (1) "Meetings"
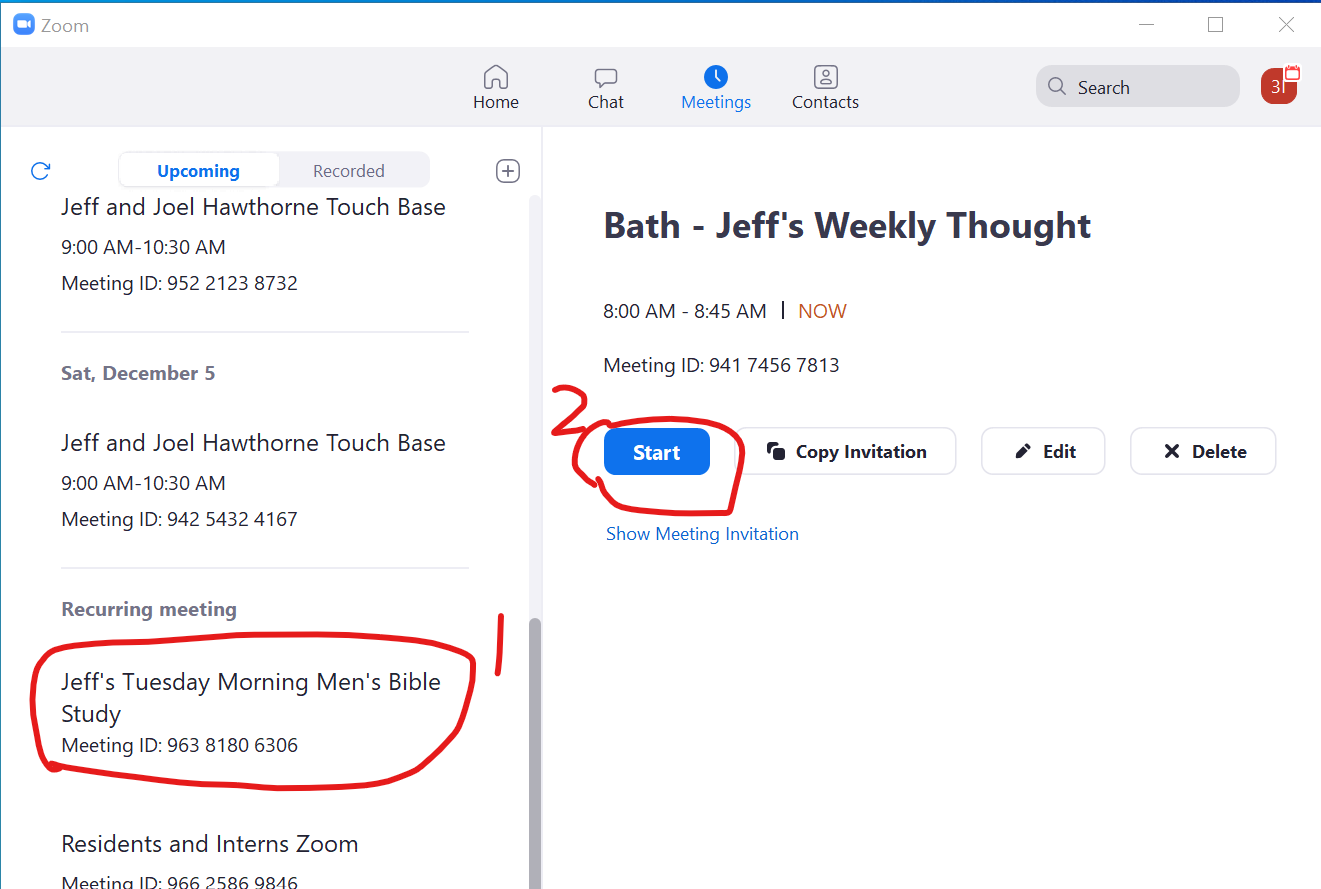
- Then scroll down the left column until you find (1) "Jeff's Tuesday Morning Men's Bible Study" and select it.
- Then click on the (2) "Start"
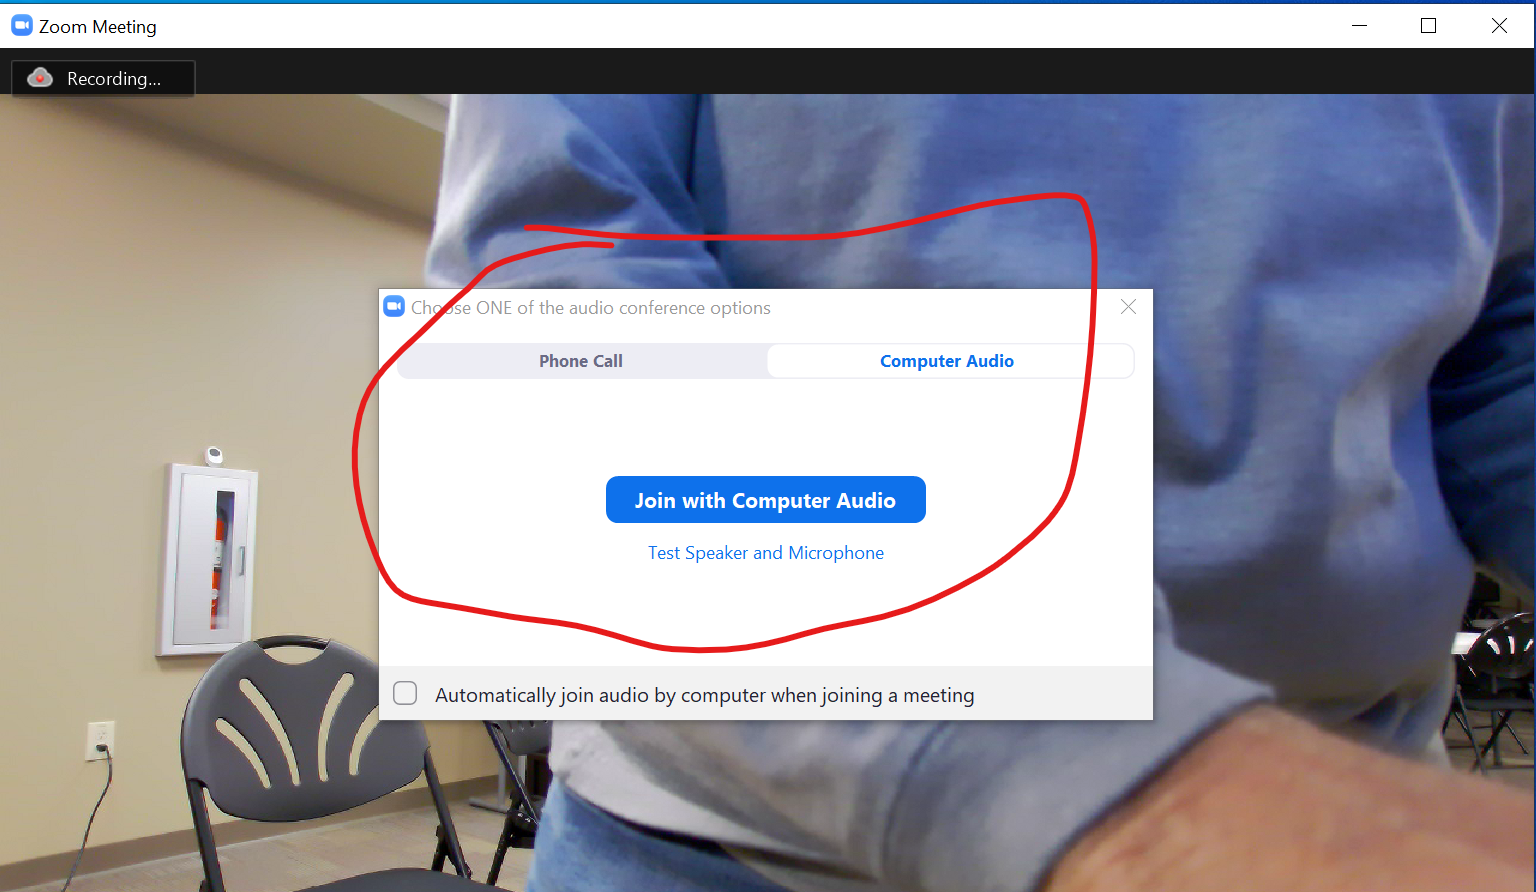
- Then in the "Choose ONE of the audio conference Options" window select "Join with Computer Audio"
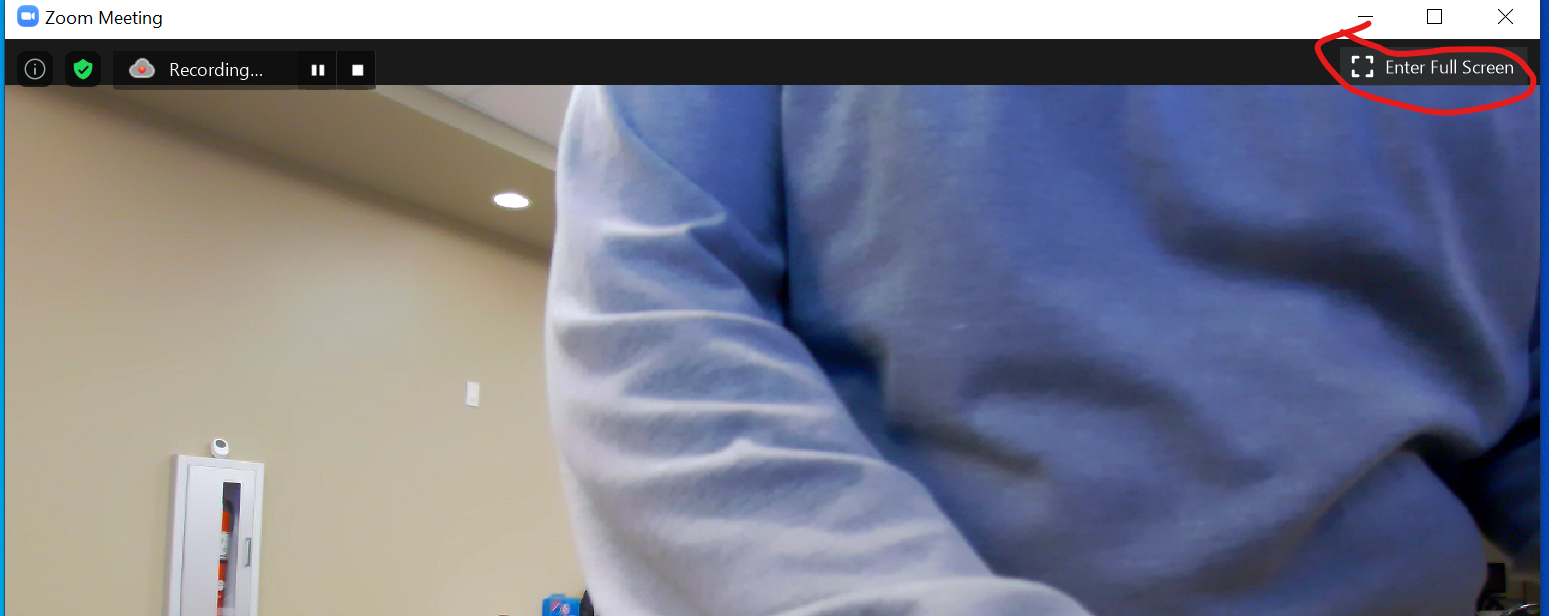
- Then select the "Enter Full Screen" mode.
Tear Down
- Select "End Meeting" lower right corner of Zoom window. Then select "End Meeting for All"
- Shutdown the PC by selecting "Shutdown" in the Windows Menu
- Power off Speakerphones
- Disconnect the CAT 6 cable from the wall jack and the PC. Then roll it up
- Unplug unit and roll up power cord.
- Roll unit back.
- Charge the speakerphones with the micro USB cables so that they are ready for the next time the conference station is used.
Airtame
Connect to Airtame
Streaming your computer screen is the exact same on Windows, MacOS, and Linux:
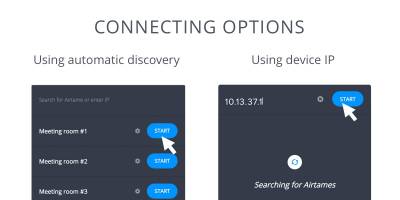
- Open the Airtame app
- In the list, find your screen's name and press “START”, Or type its IP address
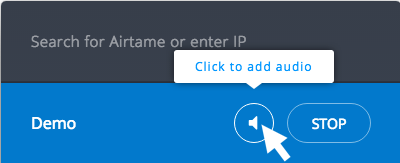
- To add sound, click on the 🔈 speaker icon to the left of the “STOP” button
🔊 Streaming with Audio
To add sound to your stream, click on the speaker icon that will appear beside the “STOP” button. This will enable audio and increase the stream quality while adding a 1-second buffer to ensure fluent playback.
If sound is coming from both your laptop and the TV you'll need to disable hardware acceleration.
➕ Extra Features
Streaming Notification
Airtame will place a reminder on your screen to remind you that you are streaming, we call this the streaming notification. It also provides the ability to quickly add audio or terminate that stream without opening the app.
The notification can be moved around the screen or dismissed by clicking on the X in the top-right corner. You can enable or disable it by going to the app settings.
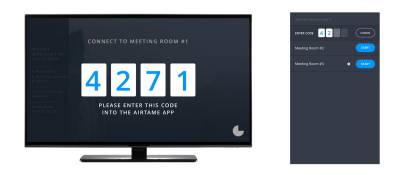
Pin Code Connect
Airtame lets you enable a pin code so users must enter a 4-digit passcode before starting a stream. The password is shown on the TV screen. This will ensure that only users in the room watching the screen can connect and start streaming.
Automatic Reconnect
If you ever get disconnected, the Airtame app will automatically try to reconnect your stream for the next 30 seconds.
If you don’t want to connect the stream again, just click the “STOP” button to cancel the reconnect. In-app chat function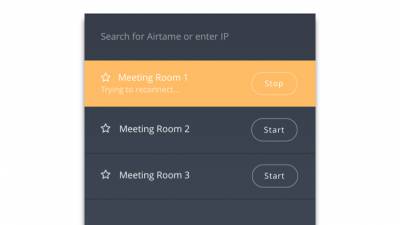
⚠️ Troubleshooting
See the message “Couldn't Connect to Airtame”?
- You may not connected to the WiFi where Airtame is available. Check the TV screen to see what WiFi Network you should be connected to.
- Ask your Airtame administrator to ensure the connection between computer and Airtame is still possible.
- Your Airtame may have been put on a guest network where the connection is not possible.
I don't see where to open the app?
Windows
- The app shows as a small icon in your System Tray. Sometimes it can be in the overflow section represented by an upward arrow ˄. In this case, we recommend dragging the icon to the main System Tray.
- If you don't see the Airtame icon in your System Tray launch the Airtame app from your Start Menu.
macOS
- The app shows as a small icon in your Menu Bar.
- If you don't see the Airtame icon in your Menu Bar launch the Airtame app from your Applications folder or LaunchPad.