During installation and enrollment, you might be prompted to allow Company Portal to use confidential information that's stored in your keychain. These prompts are part of Apple security. When you get the prompt, type in your login keychain password and select Always Allow. If you press Enter or Return on your keyboard, the prompt will select Allow, which means you may continue to receive prompts.
### Install Company Portal app 1. Go to [**Enroll My Mac for macOS**](https://go.microsoft.com/fwlink/?linkid=853070). 2. Wait while the Company Portal installer .pkg file downloads. Open the installer when it's ready. 3. On the Introduction page, select **Continue**. 4. On the **License** page, read through the Microsoft Application License Terms. Select **Continue**. 5. Select **Agree** to agree to the terms of the software license agreement. 6. On the **Installation** Type page, select **Install**. 7. Enter your device password or registered fingerprint. Then select **Install Software**. 8. Wait for Company Portal to finish installing. 9. Open the Company Portal app.Microsoft AutoUpdate might open after enrollment and update your Microsoft software. After all updates are installed, open the Company Portal app. For the best setup experience, install the latest versions of Microsoft AutoUpdate and Company Portal.
### Enroll your Mac 1. Sign in to the Company Portal app with your work or school account. 2. On the **Set up access** page, select **Begin**. 3. Review the privacy information. Then select **Continue**. 4. On the **Install management profile** page, select **Download profile.** [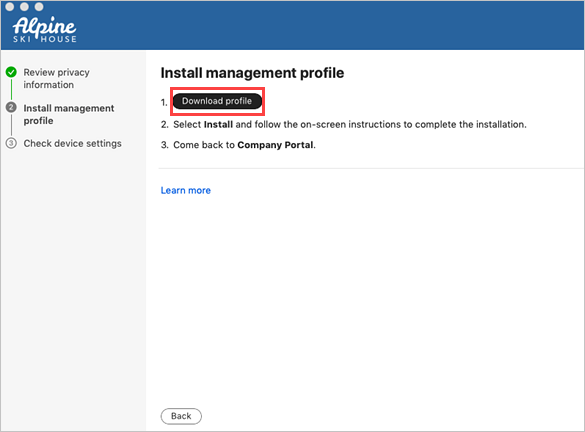](https://kb.gracechurches.org/uploads/images/gallery/2023-12/image.png) 5. Your macOS system settings open in a new window. The management profile you just downloaded is shown. 1. Select the profile to open it. 2. Select **Install...** 3. When asked to confirm installation, select **Install**. 4. Enter your device password to allow the profile to enroll your device. Then select Enroll. 6. Wait while the management profile installs and then enrolls your device. 7. Return to the Company Portal app and verify that there's a green checkmark next to **Install management profile**. 8. Your organization may require you to update your device settings. On the **Checking device settings** page, review the list of settings you need to change. Select **How to resolve this** to view related help documentation in a web browser. 9. After you make all changes, select **Retry**. Wait while Company Portal rechecks your device settings. [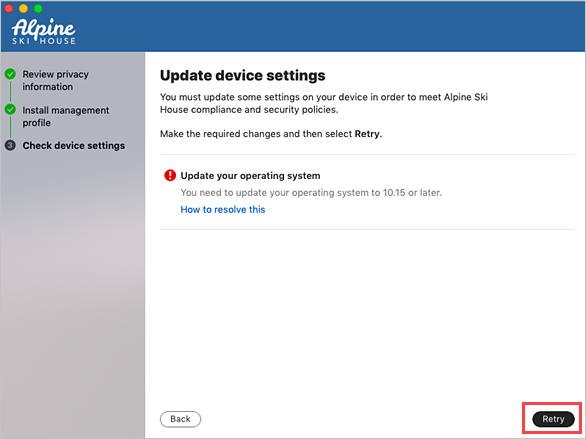](https://kb.gracechurches.org/uploads/images/gallery/2023-12/d9limage.png) 10. When setup is complete, select **Done**. Your device is ready to use for work. You can go to **Devices** in the Company Portal app to view and manage your enrolled Mac. ### Troubleshooting and feedback Contact your IT support person to troubleshoot problems with enrollment or the Company Portal app. If necessary, you can share your app logs with your support person via the Company Portal app. 1. In the Company Portal app, open the Help menu. 2. Select **Send diagnostic report**. Wait while Company Portal app logs are sent to Microsoft support and Intune Company Portal developers. This information is used to assist with troubleshooting should your support person need more help. 3. Copy your incident ID for future reference. 4. Select **Email Logs** to report the problem to your support person. Type in what you experienced in the body of the email. To share your feedback and suggestions with Intune Company Portal app developers, go to **Help** > **Send Feedback.** ### Updating the Company Portal app Updating the Company Portal app is done the same way as any other Office app, through Microsoft AutoUpdate for macOS. For more information, see [**Update Office for Mac automatically**](https://support.office.com/article/Check-for-Office-for-Mac-updates-automatically-bfd1e497-c24d-4754-92ab-910a4074d7c1).